Using Synology as a Reverse Proxy
I just learned that Synology comes with a reverse proxy powered by Nginx. I thought it would be cool to setup the reverse proxy to my Unifi Controller so that I could host the controller on a nice domain name and give it a valid SSL certificate with Let’s encrypt. The process was a bit more complex than I had anticipated, but in the end it gives a nice result.
Before we start I am assuming you already have Let’s Encrypt setup on your Synology to access your Synology desktop. This requires you to have a domain and have setup port forwarding in your router.
DNS Server
So the first thing we will want to do is setup our DNS. Even if you aren’t going to access these services externally you still need a valid DNS entry to get a certificate. Configure your DNS Server with a CNAME or A record to point your new subdomain to your Synology.
I have synology.example.com setup for my Synology so I created unifi.example.com as a CNAME to use as the domain for my Unifi Controller.
In order to resolve the domains to local addresses and to avoid exposing these services to the internet I am going to setup my Synology NAS to also be the DNS server on my network. To do this you will need to install the DNS package if you haven’t already done so.
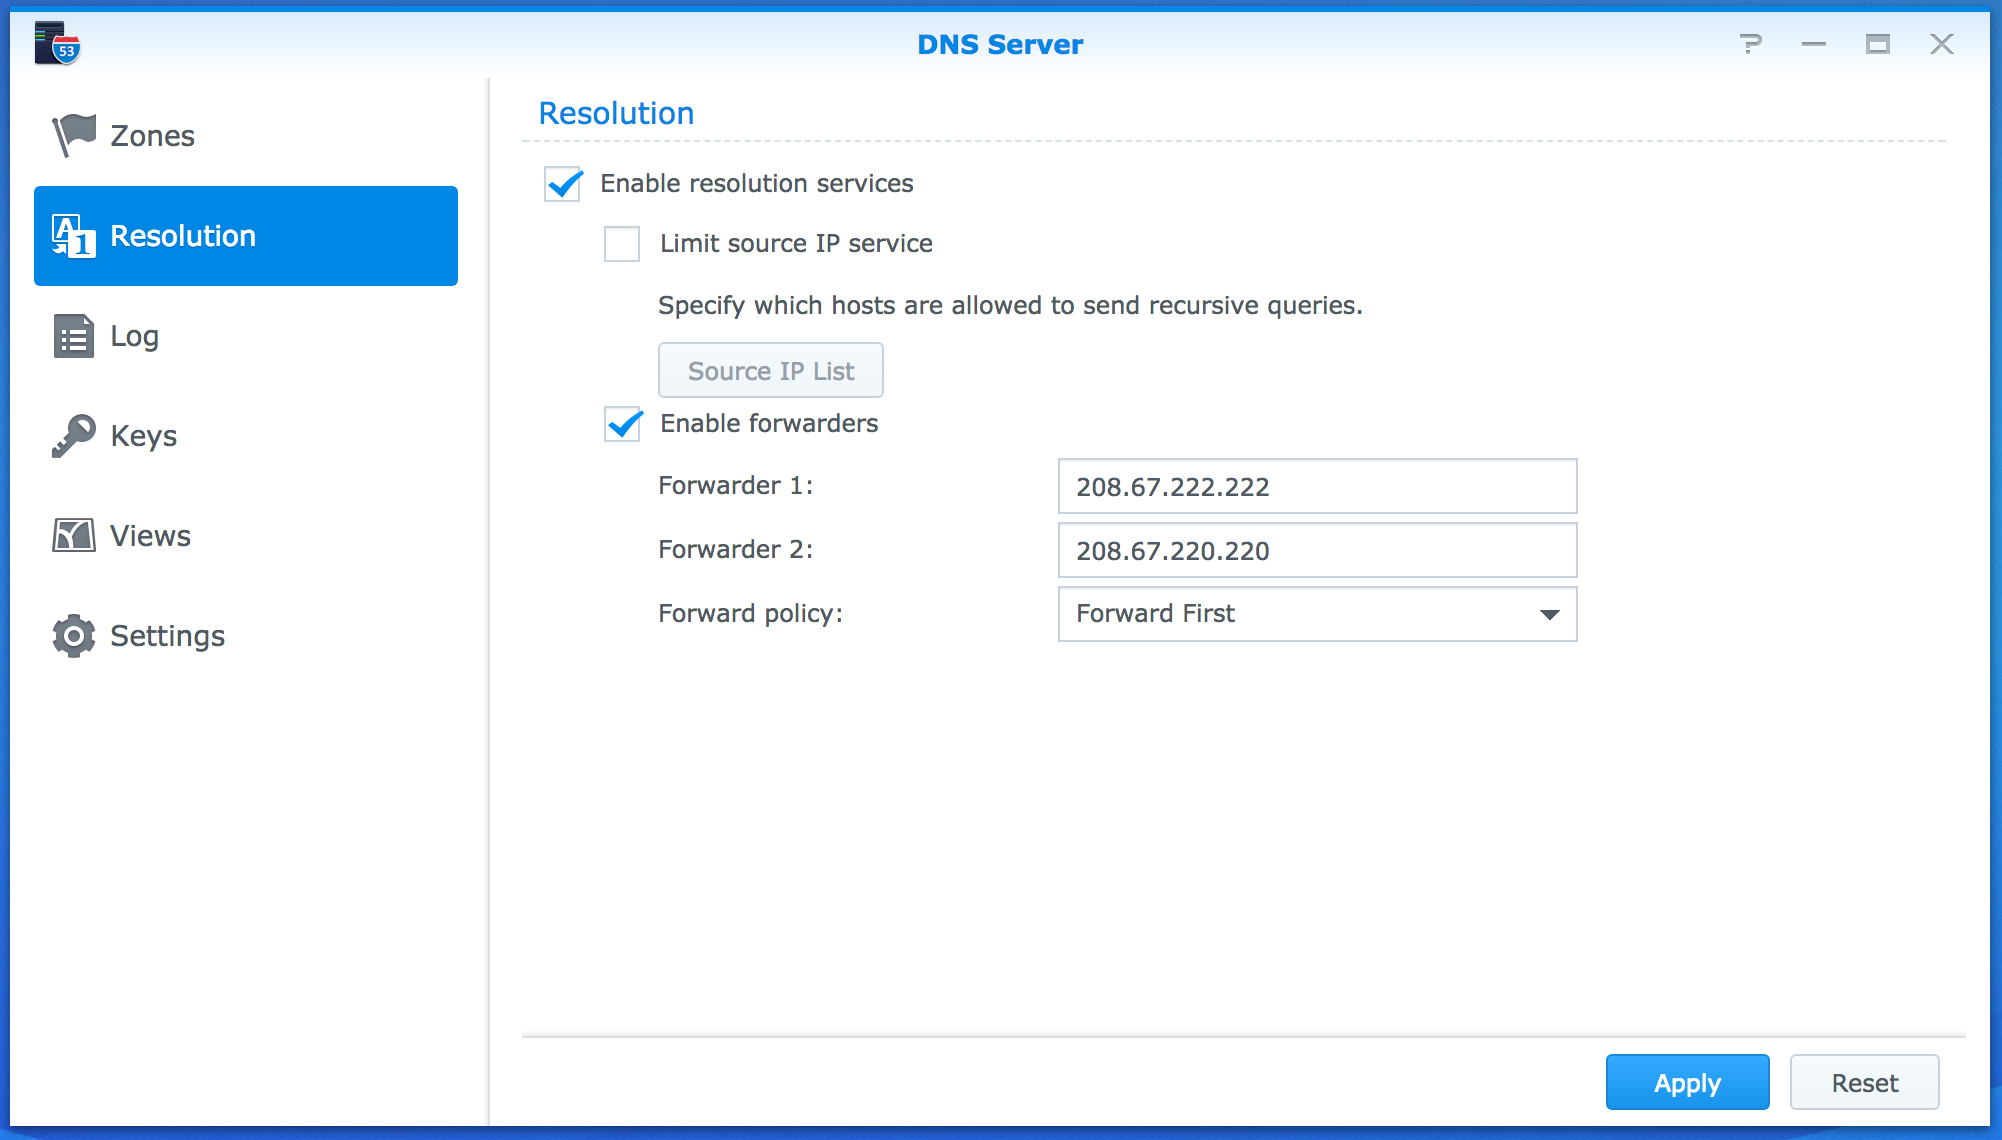
Before we use the DNS server on our local network we need to set it up for DNS forwarding. Do so by configuring the following settings in the Synology DNS Server. Note, I am using OpenDNS nameservers, but you can use any public DNS.
Now you will need to set your router’s DHCP server to provide the IP address of your Synology as the DNS server rather than a public DNS or the router’s IP address. This varies by router so instructions aren’t included here.
After you setup your router and ensured your local computer is using Synology DNS you should still have a correctly functioning internet connection. If not, something has gone wrong.
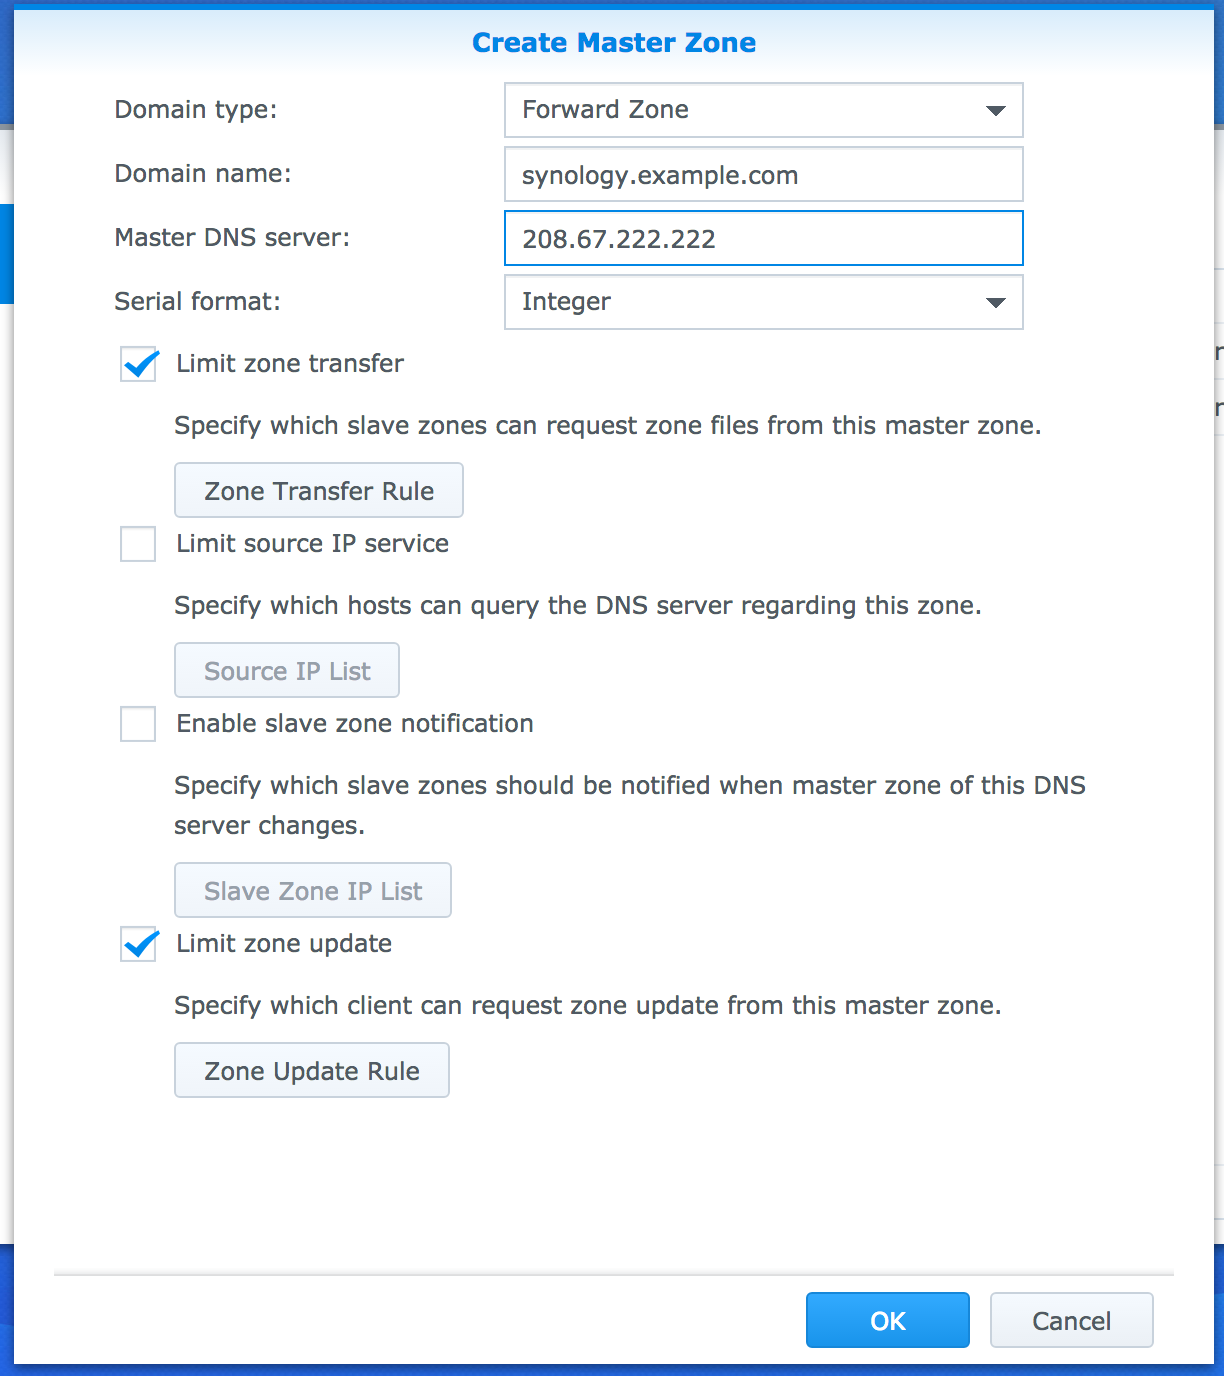
Next, we will setup the Synology DNS to provide local addresses for our devices so we don’t have to go through our router’s public connection and open up more ports. We will just keep these services local to our private network. Back in the DNS Server configuration you will create a Master Zone.
Note, there are two ways you can do this. If you want to override all of the DNS entries for your entire domain you can create a master zone for your domain like
example.comHowever, if you only want to override certain entries likeunifi.example.comyou can create a Master Zone for just the subdomains.
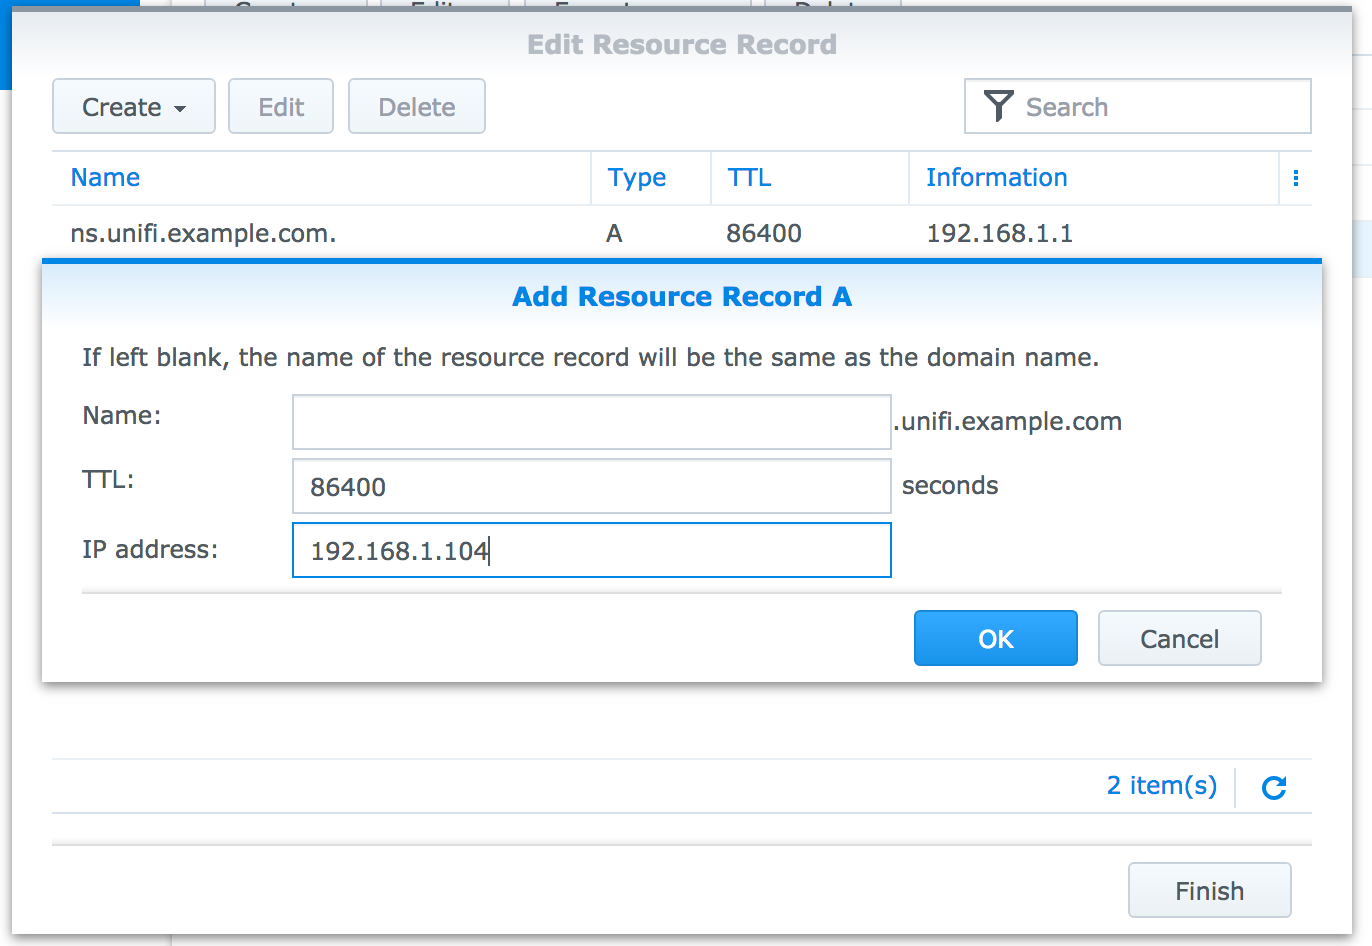
Next, you need to create a record for the zone. If you are just overriding the subdomain you would create a A Record pointing the zone root. To open this right click on the zone you just created and select Resource Record. In that dialog select Create and click A Type. Leave the name field blank and enter the local IP address of your app’s server.
You will need to create a zone and record for each subdomain you are creating. Typically, you would do this for the Synology itself and other apps like the Unifi Controller.
Web Station
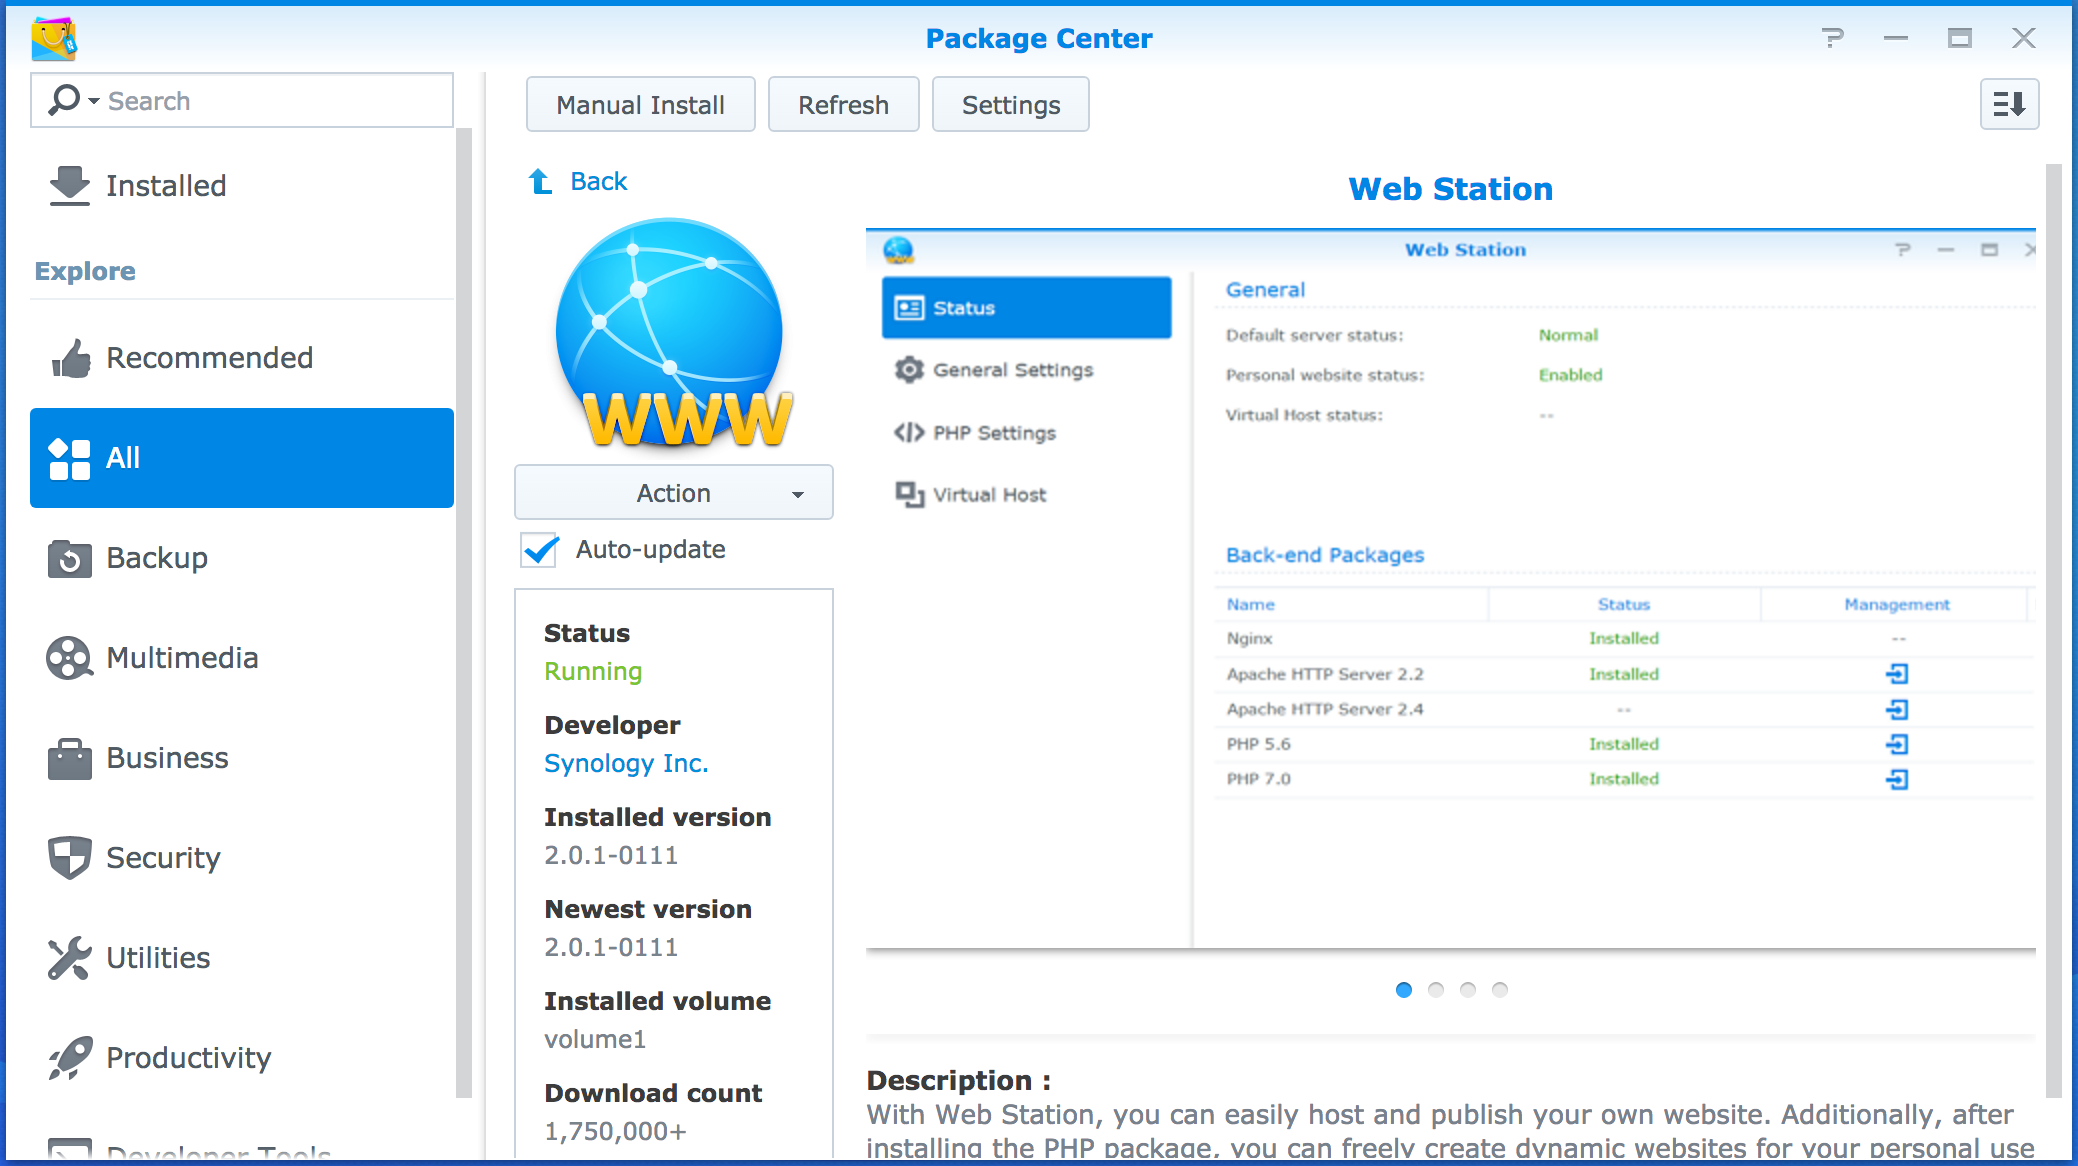
Next, if you haven’t already done so install the Web Station package.
The first thing that will happen when you enable Web Station is your default device url will no longer redirect you to the correct port of your device because a new page is hosted there. To fix that I enabled PHP on the default site and create index.php that does this redirect for me. This is optional depending on what you want to do with your default site.
To enable PHP open Web Station and go to General Settings then select a PHP version from the drop down. Then connect to your device via SSH do the following.
> cd /volume1/web/
> rm index.html
> vi index.php
Set the contents of the file to the following. Setting the domain and port to whatever your synology device runs on.
<?php
header('Location: https://synology.example.com:5001');
?>
Save the file and test it out by going to the domain. Now, if you type in synology.example.com you should be redirected to the correct port.
You also need to create a virtual server for each subdomain you want to create certificates for. To do so open the Virtual Host tab in Web Station and click create. You will want to create a new folder for each virtual host you are creating.

At this point if you navigate to your host (unifi.example.com) in your browser you should see first a certificate error (we will fix that next) and after you pass that you should get the default Synology landing page.
We will also want to create a redirect here to send us to the right port on whatever device we are using. Similar to what we did above navigate to the folder you created for this virtual host and create an index.php file to redirect to the right url/port. Make sure to delete the index.html file too.
Application Portal
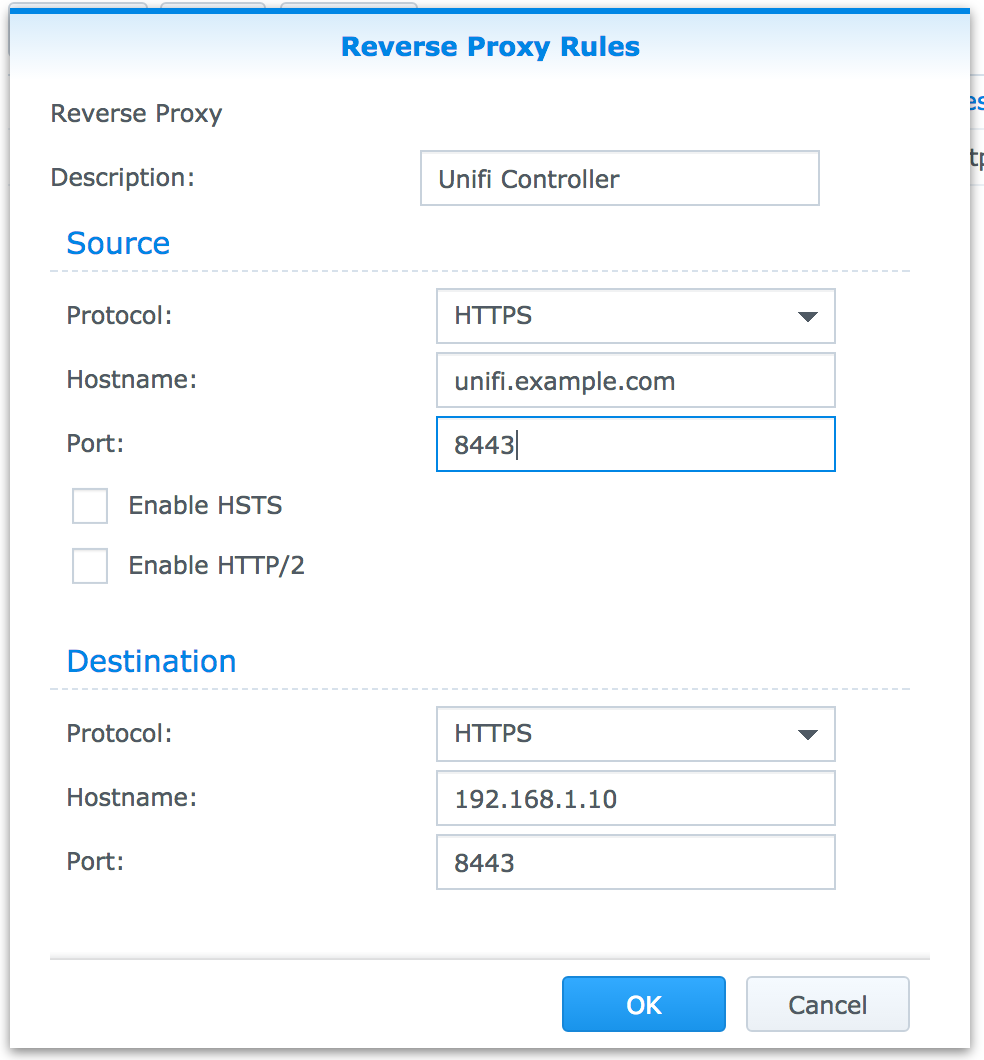
Next, we will setup Nginx on the Synology as a reverse proxy to our app’s server. To do this open the Control Panel and navigate to Application Portal then open the Reverse Proxy tab. Set the host to your application’s subdomain and set the ports as required.
Certificate
Finally, we need to create a certificate for our new subdomain. Open the Control Panel and navigate to Security and open the Certificate tab. Click Add and set the options for your certificate using Let’s Encrypt. The domain name should be the same as the subdomain you are using for your app such as unifi.example.com

If you get an error creating the certificate is it likely that port 80 is not being forwarded correctly. One thing to note with Synology is that you shouldn’t try to remap ports unless you really know what you are doing.
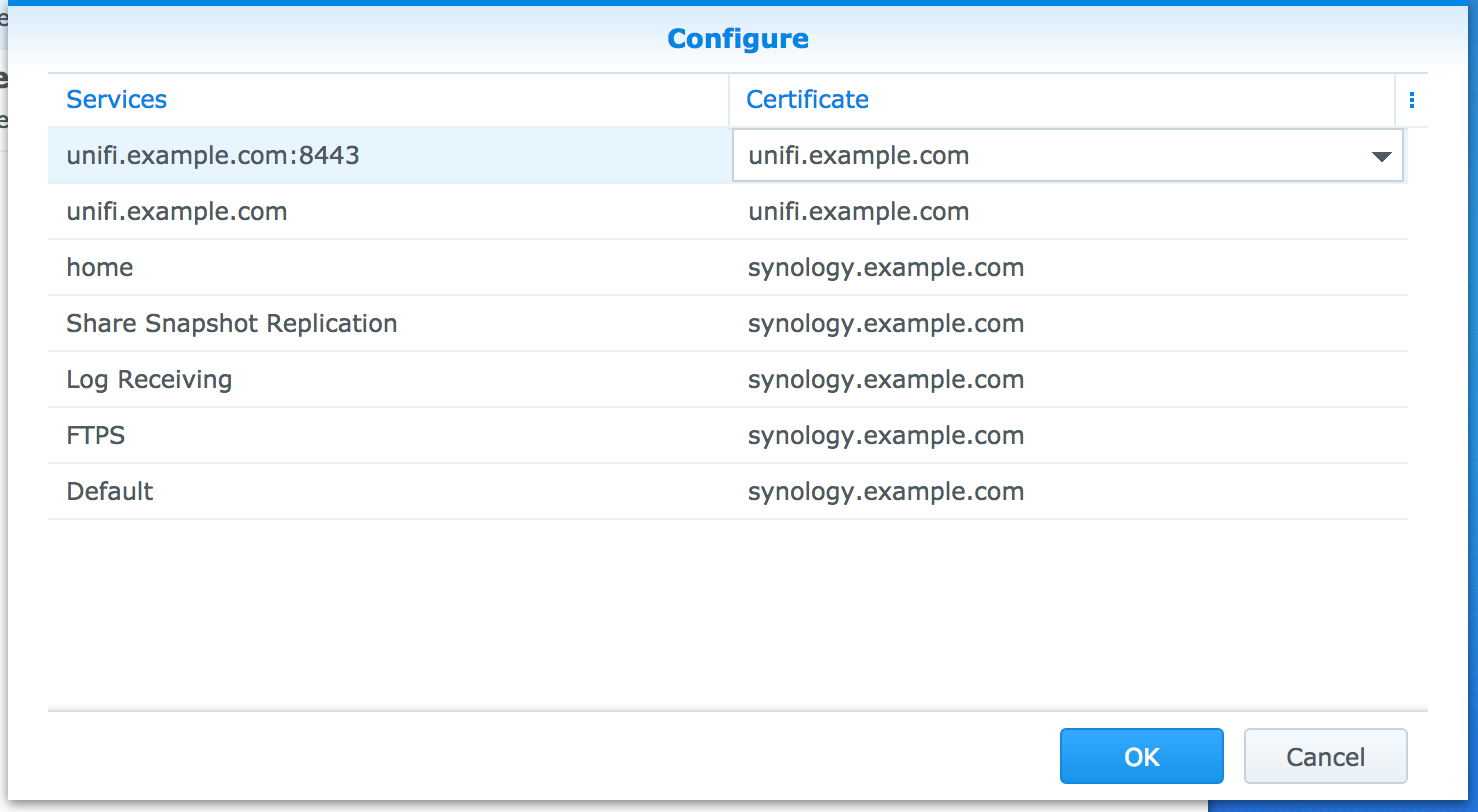
The last step is to map the correct certificate to the correct application. To do this open the Configure settings and set the each host to the correct certificate.
Note, some applications may require web sockets. Unforutnately, this isn’t support out of the box but you can make it work as shown in these instructions
Wrapup
At this point you should be able to load your application and it should have a valid SSL certificate. One thing that is probably possible is to remap ports and use 80 or 443 instead of whatever port your application uses by default. I haven’t tried this, but I suspect that if you use port 80 there might be a problem creating the Let’s Encrypt certificates as those require serving a file on port 80. This can probably be overcome by manually editing the Nginx configuration, but I didn’t go down that route.
Let me know if you have any questions or feedback.