Jekyll2022-12-01T16:13:28+00:00https://ntotten.com/feed.xmlNathan TottenThoughts and Experiences with Software Development.Securing a PHP app behind Cloudflare Access with JWT Verification2020-02-26T00:00:00+00:002020-02-26T00:00:00+00:00https://ntotten.com/2020/02/26/php-app-behind-cloudflare-access-with-jwt<p>I recently was working on a simple PHP utility that was secured with an <code class="language-plaintext highlighter-rouge">.htaccess</code> file using a single username and password that was shared by multiple people. This leaves a lot to be desired in terms of security and maintainability.</p>
<p>I am a huge fan of Cloudflare and their <a href="https://developers.cloudflare.com/access/about/how-access-works/">Cloudflare Access</a> product was a perfect fit to move this application to modern authentication. To secure your app with Cloudflare Access you should both restrict access to only <a href="https://www.cloudflare.com/ips/">Cloudflare’s IPs</a> and most importantly <a href="https://developers.cloudflare.com/access/setting-up-access/validate-jwt-tokens/">verify the JWT</a> that is sent by Cloudflare.</p>
<p>To verify the token, I am using the <a href="https://github.com/auth0/auth0-PHP">Auth0-PHP</a> library. The library is mostly just a wrapper around <a href="https://github.com/lcobucci/jwt">lcobucci/jwt</a>, but I found the interface to be much simpler to use. We will also use Guzzel for HTTP requests and a simple utility to convert certificates.</p>
<p>To install the dependancies:</p>
<pre><code class="language-txt">$ composer require auth0/auth0-php
$ composer require codercat/jwk-to-pem
$ composer require guzzlehttp/guzzle:~6.0
</code></pre>
<p>Next, add the following code to your application.</p>
<div class="language-php highlighter-rouge"><div class="highlight"><pre class="highlight"><code><span class="cp"><?php</span>
<span class="kn">use</span> <span class="nc">Auth0\SDK\Helpers\Tokens\AsymmetricVerifier</span><span class="p">;</span>
<span class="kn">use</span> <span class="nc">Auth0\SDK\Helpers\Tokens\IdTokenVerifier</span><span class="p">;</span>
<span class="kn">use</span> <span class="nc">CoderCat\JWKToPEM\JWKConverter</span><span class="p">;</span>
<span class="nv">$issuer</span> <span class="o">=</span> <span class="nb">getenv</span><span class="p">(</span><span class="s1">'CLOUDFLARE_ACCESS_ISSUER'</span><span class="p">);</span>
<span class="nv">$aud</span> <span class="o">=</span> <span class="nb">getenv</span><span class="p">(</span><span class="s1">'CLOUDFLARE_ACCESS_AUD'</span><span class="p">);</span>
<span class="nv">$cfAuth</span> <span class="o">=</span> <span class="nv">$_COOKIE</span><span class="p">[</span><span class="s1">'CF_Authorization'</span><span class="p">]</span> <span class="o">??</span> <span class="s1">''</span><span class="p">;</span>
<span class="k">if</span> <span class="p">(</span><span class="nb">empty</span><span class="p">(</span><span class="nv">$cfAuth</span><span class="p">))</span> <span class="p">{</span>
<span class="nb">header</span><span class="p">(</span><span class="s1">'HTTP/1.0 403 Forbidden'</span><span class="p">);</span>
<span class="k">exit</span><span class="p">();</span>
<span class="p">}</span>
<span class="k">function</span> <span class="n">getKey</span><span class="p">(</span><span class="nv">$jwksUrl</span><span class="p">)</span>
<span class="p">{</span>
<span class="nv">$client</span> <span class="o">=</span> <span class="k">new</span> <span class="nc">GuzzleHttp\Client</span><span class="p">();</span>
<span class="nv">$res</span> <span class="o">=</span> <span class="nv">$client</span><span class="o">-></span><span class="nf">request</span><span class="p">(</span><span class="s1">'GET'</span><span class="p">,</span> <span class="nv">$jwksUrl</span><span class="p">);</span>
<span class="k">if</span> <span class="p">(</span><span class="nv">$res</span><span class="o">-></span><span class="nf">getStatusCode</span><span class="p">()</span> <span class="o">!=</span> <span class="s1">'200'</span><span class="p">)</span> <span class="p">{</span>
<span class="k">throw</span> <span class="k">new</span> <span class="err">\</span><span class="nf">Exception</span><span class="p">(</span><span class="s1">'Could not fetch JWKS'</span><span class="p">);</span>
<span class="p">}</span>
<span class="nv">$json</span> <span class="o">=</span> <span class="nv">$res</span><span class="o">-></span><span class="nf">getBody</span><span class="p">();</span>
<span class="nv">$jwks</span> <span class="o">=</span> <span class="nb">json_decode</span><span class="p">(</span><span class="nv">$json</span><span class="p">);</span>
<span class="nv">$key_id</span> <span class="o">=</span> <span class="nv">$jwks</span><span class="o">-></span><span class="n">keys</span><span class="p">[</span><span class="mi">0</span><span class="p">]</span><span class="o">-></span><span class="n">kid</span><span class="p">;</span>
<span class="nv">$jwkConverter</span> <span class="o">=</span> <span class="k">new</span> <span class="nc">JWKConverter</span><span class="p">();</span>
<span class="nv">$key</span> <span class="o">=</span> <span class="nv">$jwkConverter</span><span class="o">-></span><span class="nf">toPEM</span><span class="p">((</span><span class="k">array</span><span class="p">)</span> <span class="nv">$jwks</span><span class="o">-></span><span class="n">keys</span><span class="p">[</span><span class="mi">0</span><span class="p">]);</span>
<span class="k">return</span> <span class="p">[</span><span class="nv">$key_id</span> <span class="o">=></span> <span class="nv">$key</span><span class="p">];</span>
<span class="p">}</span>
<span class="k">try</span> <span class="p">{</span>
<span class="nv">$id_token</span> <span class="o">=</span> <span class="nb">rawurldecode</span><span class="p">(</span><span class="nv">$cfAuth</span><span class="p">);</span>
<span class="nv">$key</span> <span class="o">=</span> <span class="nf">getKey</span><span class="p">(</span><span class="nv">$issuer</span> <span class="mf">.</span> <span class="s1">'/cdn-cgi/access/certs'</span><span class="p">);</span>
<span class="nv">$signature_verifier</span> <span class="o">=</span> <span class="k">new</span> <span class="nc">AsymmetricVerifier</span><span class="p">(</span><span class="nv">$key</span><span class="p">);</span>
<span class="nv">$token_verifier</span> <span class="o">=</span> <span class="k">new</span> <span class="nc">IdTokenVerifier</span><span class="p">(</span><span class="nv">$issuer</span><span class="p">,</span> <span class="nv">$aud</span><span class="p">,</span> <span class="nv">$signature_verifier</span><span class="p">);</span>
<span class="nv">$user_identity</span> <span class="o">=</span> <span class="nv">$token_verifier</span><span class="o">-></span><span class="nf">verify</span><span class="p">(</span><span class="nv">$id_token</span><span class="p">);</span>
<span class="c1">// Do something with identity if you need</span>
<span class="c1">// i.e. store it in session, etc.</span>
<span class="p">}</span> <span class="k">catch</span> <span class="p">(</span><span class="err">\</span><span class="nc">Exception</span> <span class="nv">$e</span><span class="p">)</span> <span class="p">{</span>
<span class="nb">header</span><span class="p">(</span><span class="s1">'HTTP/1.0 403 Forbidden'</span><span class="p">);</span>
<span class="k">exit</span><span class="p">();</span>
<span class="p">}</span>
</code></pre></div></div>
<p>You will need to get the environmental variables as follows.</p>
<p>The <code class="language-plaintext highlighter-rouge">CLOUDFLARE_ACCESS_ISSUER</code> is just your cloudflare Access domain <code class="language-plaintext highlighter-rouge">https://<account>.cloudflareaccess.com</code>.</p>
<p>The <code class="language-plaintext highlighter-rouge">CLOUDFLARE_ACCESS_AUD</code> can be found on the Cloudflare dashboard when creating an access policy, it is called <code class="language-plaintext highlighter-rouge">Audience Tag</code> in the dashboard.</p>
<p>Set those environmental variables and everything should be good. If you need to access the account details you can get the <code class="language-plaintext highlighter-rouge">sub</code> and <code class="language-plaintext highlighter-rouge">email</code> claims from the <code class="language-plaintext highlighter-rouge">$user_identity</code> object returned when you verify the token.</p>
<p>That’s it, your app is now secured with modern identity that can be setup with single-sign-on.</p>I recently was working on a simple PHP utility that was secured with an .htaccess file using a single username and password that was shared by multiple people. This leaves a lot to be desired in terms of security and maintainability.Running NGINX on Heroku with Docker2018-07-22T00:00:00+00:002018-07-22T00:00:00+00:00https://ntotten.com/2018/07/22/nginx-on-heroku<p>Docker is a great way to manage your NGINX deployments. Heroku is a great place to deploy Docker. While many of the buildpacks on Heroku use NGINX and can be configured to also serve as a reverse proxy, it sometimes is useful to run NGINX on its own.</p>
<p>The setup and config are about as easy as it gets. First, create a Dockerfile as shown below.</p>
<div class="language-dockerfile highlighter-rouge"><div class="highlight"><pre class="highlight"><code><span class="k">FROM</span><span class="s"> nginx</span>
<span class="k">COPY</span><span class="s"> nginx.conf /etc/nginx/conf.d/default.conf</span>
<span class="k">CMD</span><span class="s"> sed -i -e 's/$PORT/'"$PORT"'/g' /etc/nginx/conf.d/default.conf && nginx -g 'daemon off;'</span>
</code></pre></div></div>
<p>The one thing to notice is that I am using <code class="language-plaintext highlighter-rouge">sed</code> to replace the string <code class="language-plaintext highlighter-rouge">$PORT</code> in the <code class="language-plaintext highlighter-rouge">nginx.conf</code> file with the environmental variable <code class="language-plaintext highlighter-rouge">PORT</code>. This is because Heroku assigns a port to the dyno when it is started and handles the routing. So you can’t just set a fixed port like 443 in the config.</p>
<p>Next, create your <code class="language-plaintext highlighter-rouge">nginx.conf</code> file.</p>
<div class="language-nginx highlighter-rouge"><div class="highlight"><pre class="highlight"><code><span class="k">server</span> <span class="p">{</span>
<span class="kn">listen</span> <span class="nv">$PORT</span><span class="p">;</span>
<span class="kn">location</span> <span class="n">/</span> <span class="p">{</span>
<span class="kn">proxy_pass</span> <span class="s">http://example.com</span><span class="p">;</span>
<span class="kn">proxy_redirect</span> <span class="no">off</span><span class="p">;</span>
<span class="kn">proxy_set_header</span> <span class="s">X-Real-IP</span> <span class="nv">$remote_addr</span><span class="p">;</span>
<span class="kn">proxy_set_header</span> <span class="s">X-Forwarded-For</span> <span class="nv">$proxy_add_x_forwarded_for</span><span class="p">;</span>
<span class="kn">proxy_set_header</span> <span class="s">X-Forwarded-Host</span> <span class="nv">$server_name</span><span class="p">;</span>
<span class="p">}</span>
</code></pre></div></div>
<p>Next, create an app in Heroku and deploy the container by running the following commands.</p>
<blockquote>
<p>Note you need to login to Heroku (<code class="language-plaintext highlighter-rouge">heroku login</code> and to the container service (<code class="language-plaintext highlighter-rouge">heroku container:login</code>) through the CLI before you run the next commands.</p>
</blockquote>
<div class="language-bash highlighter-rouge"><div class="highlight"><pre class="highlight"><code>docker build <span class="nt">-t</span> web <span class="nb">.</span>
heroku container:push web <span class="nt">--app</span> <APPNAME>
heroku container:release web <span class="nt">--app</span> <APPNAME>
</code></pre></div></div>
<p>And that’s it, you now have NGINX deployed as a Docker container on Heroku.</p>Docker is a great way to manage your NGINX deployments. Heroku is a great place to deploy Docker. While many of the buildpacks on Heroku use NGINX and can be configured to also serve as a reverse proxy, it sometimes is useful to run NGINX on its own.Converting Salesforce Metadata to Source Format While Maintain Git History2018-05-11T00:00:00+00:002018-05-11T00:00:00+00:00https://ntotten.com/2018/05/11/convert-metadata-to-source-format-while-maintain-git-history<p>If you have a massive Salesforce project that is in metadata format and tracked in git, you have a lot of valuable history in that project. You cannot merely do a bulk convert on that project to the new source format and lose complete access to that history. It is a little work, but it is possible to do the conversion and maintain your git history.</p>
<p>First, I’ll explain the reason this isn’t working. When you rename a file in git usually it is pretty good about detecting the changes. However, the problem arises when there is an enormous amount of changes at one time. Git has <a href="https://stackoverflow.com/questions/13805750/git-fails-to-detect-renaming/13808715#13808715">built in limits</a>, and it will fail to figure out what renames occurred because there is too much going on.</p>
<p>The solution on the surface is simple. Do the convert in smaller chunks. However, there are a few caveats to be aware. Below I will walk through the steps used for converting an application (in this case dreamhouse in metadata form).</p>
<p>First, start with your project in metadata format. It would look something like the below structure with all of the code in metadata format in the <code class="language-plaintext highlighter-rouge">./metadata</code> folder.</p>
<pre><code class="language-txt">.
├── README.md
└─── metadata
├── objectTranslations
├── objects
│ ├── Bot_Command__c.object
│ └── ...
├── package.xml
├── pages
├── pathAssistants
├── permissionsets
├── quickActions
├── remoteSiteSettings
├── reports
├── staticresources
│ ├── leaflet.resource
│ ├── leaflet.resource-meta.xml
│ └── ...
├── tabs
├── triggers
└── workflows
</code></pre>
<p>The first thing to do is create a temporary SFDX project outside of the git repo.</p>
<div class="language-bash highlighter-rouge"><div class="highlight"><pre class="highlight"><code><span class="nv">$ </span>sfdx force:project:create <span class="nt">-n</span> tempproj
</code></pre></div></div>
<p>Next, convert the project in metadata into the temporary project.</p>
<div class="language-bash highlighter-rouge"><div class="highlight"><pre class="highlight"><code><span class="nv">$ </span>sfdx force:mdapi:convert <span class="nt">--rootdir</span> ./project/metadata <span class="nt">--outputdir</span> ./tempproj
</code></pre></div></div>
<p>After this runs you will have two copies of your application. One in the original location and one in the new <code class="language-plaintext highlighter-rouge">temproj</code> directory.</p>
<p>The first thing to do is move over the <code class="language-plaintext highlighter-rouge">sfdx-project.json</code> file and <code class="language-plaintext highlighter-rouge">config</code> folder and commit them to the repo.</p>
<div class="language-bash highlighter-rouge"><div class="highlight"><pre class="highlight"><code><span class="nv">$ </span><span class="nb">mv</span> ./tempproj/sfdx-project.json ./project/sfdx-project.json
<span class="nv">$ </span><span class="nb">mv</span> ./tempproj/confg ./project/config
<span class="nv">$ </span>git add <span class="nt">-A</span>
<span class="nv">$ </span>git commit <span class="nt">-m</span> <span class="s2">"Created sfdx-project.json and config"</span>
</code></pre></div></div>
<p>Next, create the new folder structure.</p>
<div class="language-bash highlighter-rouge"><div class="highlight"><pre class="highlight"><code><span class="nv">$ </span><span class="nb">mkdir</span> ./project/force-app
<span class="nv">$ </span><span class="nb">mkdir</span> ./project/force-app/main
<span class="nv">$ </span><span class="nb">mkdir</span> ./project/force-app/main/default
</code></pre></div></div>
<p>Now is when you can start converting to the metadata format. For most metadata types this is reasonably straightforward. If the type is just composed of one or two files (a source file and a metadata.xml file or just the single xml file) you can simply copy these over. For these types, you should be able to copy entire folders of the converted source to its new location, delete the old metadata, and do a git commit. Everything should be detected correctly. If it isn’t you may need to split the changes to be less than a whole folder - you may have too many files.</p>
<p>For example, moving Triggers would look like this.</p>
<div class="language-bash highlighter-rouge"><div class="highlight"><pre class="highlight"><code><span class="nv">$ </span><span class="nb">mv</span> ./tempproj/force-app/main/default/triggers ./project/force-app/main/default/triggers
<span class="nv">$ </span><span class="nb">rm</span> <span class="nt">-rf</span> ./project/metadata/triggers
<span class="nv">$ </span>git add <span class="nt">-A</span>
<span class="nv">$ </span>git commit <span class="nt">-m</span> <span class="s2">"Converted triggers to source format"</span>
</code></pre></div></div>
<p>You repeat this process for every file/folder that contains the simple metadata format.</p>
<p>The tricky part comes when the new format of source uses what we call expanded source. Expanded source is when a single metadata item is split into multiple files. An example of this is Custom Objects. What I have found best, in this case, is to first move over the original metadata formatted file and rename it to the source file format so that git can pick up the move and rename, and then replace the file with the source format.</p>
<p>First, move the metadata format file to the source format location and commit the change.</p>
<div class="language-bash highlighter-rouge"><div class="highlight"><pre class="highlight"><code><span class="nv">$ </span><span class="nb">mkdir</span> ./project/force-app/main/default/objects
<span class="nv">$ </span><span class="nb">mkdir</span> ./project/force-app/main/default/objects/MyObject__c
<span class="nv">$ </span><span class="nb">mv</span> ./project/metadata/objects/MyObject__c.object /
./project/force-app/main/default/objects/MyObject__c/MyObject__c.object-meta.xml
<span class="nv">$ </span>git add <span class="nt">-A</span>
<span class="nv">$ </span>git commit <span class="nt">-m</span> <span class="s2">"Moved MyObject to source format location"</span>
</code></pre></div></div>
<p>Next, move over the source formatted files to the source format location, while also overwriting the old metadata formatted version in that location.</p>
<div class="language-bash highlighter-rouge"><div class="highlight"><pre class="highlight"><code><span class="nv">$ </span><span class="nb">mv</span> <span class="nt">-f</span> ./tempproj/force-app/main/default/objects/MyObject__c/<span class="k">**</span>/<span class="k">*</span>.<span class="k">*</span> ./project/force-app/main/default/objects/MyObject__c
<span class="nv">$ </span>git add <span class="nt">-A</span>
<span class="nv">$ </span>git commit <span class="nt">-m</span> <span class="s2">"Converted MyObject to source format"</span>
</code></pre></div></div>
<p>You should be able to repeat either of these two processes for everything in your project to maintain the source history after your move to the new source format.</p>
<p>Let me know if you run into any issues or have any suggestions: <a href="https://twitter.com/ntotten">@ntotten</a>.</p>
<p><strong>UPDATE on 2018-09-10</strong>: I ran into another option that might make some of the conversion even easier. Git has a <a href="http://www.brettallred.com/blog/2012/02/18/you-may-want-to-set-your-merge-renamelimit-git">configuration option</a> that controls how many files it will scan to determine renames. I tested this option out and it seemed to pick up all renames except for custom objects in a single commit.</p>
<div class="language-bash highlighter-rouge"><div class="highlight"><pre class="highlight"><code>git config merge.renameLimit 999999
sfdx force:mdapi:convert <span class="nt">-r</span> src <span class="nt">-d</span> src2
<span class="nb">rm</span> <span class="nt">-rf</span> src
<span class="nb">mv </span>src2 src
git add <span class="nt">-A</span>
git commit <span class="nt">-m</span> <span class="s2">"Converted from metadata to source format"</span>
git config <span class="nt">--unset</span> merge.renameLimit <span class="c"># Return the git config option to the default</span>
</code></pre></div></div>If you have a massive Salesforce project that is in metadata format and tracked in git, you have a lot of valuable history in that project. You cannot merely do a bulk convert on that project to the new source format and lose complete access to that history. It is a little work, but it is possible to do the conversion and maintain your git history.Simplify SFDX Project Metadata with Gulp2018-02-09T00:00:00+00:002018-02-09T00:00:00+00:00https://ntotten.com/2018/02/09/simplify-sfdx-metadata-with-gulp<p>I have recently been thinking about how metadata surfaces in SFDX projects and how we might be able to simplify the experience. One thing that bothers me is that there is tons of redundancy with the <code class="language-plaintext highlighter-rouge">-meta.xml</code> files. For example, a project with 50 Apex classes will have 50 <code class="language-plaintext highlighter-rouge">-meta.xml</code> files that are almost always exactly the same. This makes things like changing the API version for every class cumbersome. Additionally, it means that rather than right clicking a folder and creating a new MyClass.cls file to create an Apex class you either have to use the CLI or copy and paste a bunch of XML from another class.</p>
<p>With these problems in mind I have started to experiment with how we might make this a more modern and enjoyable development experience. Before we dive in, please keep in mind that this is a <strong>prototype</strong>. I am putting this out there mainly to get feedback and see if this is worth investing additional time. This is definitely not fully baked, so please let me know what you think.</p>
<p>So to begin let me explain how the process will work. Then I will show you how you can set this up in your own project (again, warning about being a prototype.)</p>
<p>Normally, with an SFDX project you have a source folder that contains the files that make up your project and that you are directly editing. These files are used to push to your scratch org or to create a package.</p>
<p>For this project, I am going to change the above pattern a bit. Instead of considering our source folder to be the finalized representation of our product, we are going to change it to be the “preprocessed” source. We will do a build using Gulp that will transform the raw source into “SFDX” source and create an <code class="language-plaintext highlighter-rouge">out</code> folder. The <code class="language-plaintext highlighter-rouge">out</code> folder is what will be used to push and build packages. The <code class="language-plaintext highlighter-rouge">out</code> folder will not be added to our git repo as it is generated.</p>
<p>So our project structure will look like this.</p>
<div class="language-plaintext highlighter-rouge"><div class="highlight"><pre class="highlight"><code>/config
/data
/out
/src
sfdx-project.json
</code></pre></div></div>
<p>
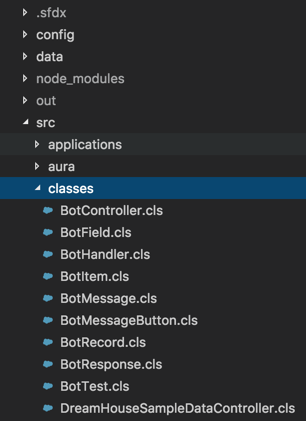
So what this all means is that we can eliminate a bunch of duplicate <code class="language-plaintext highlighter-rouge">-meta.xml</code> files from our source. For example this is the Dreamhouse classes folder when using this utility, no <code class="language-plaintext highlighter-rouge">-meta.xml</code> files are required next to the Apex classes.</p>
<p><img src="/images/2018/02/sfdx_classes_folder.png" alt="Dreamhouse Classes" /></p>
<h2 id="setup-your-project">Setup Your Project</h2>
<p>Next, you will see how to configure this utility in your own project. Since we will be using Gulp, the first thing to do is create a <code class="language-plaintext highlighter-rouge">package.json</code> file and install <code class="language-plaintext highlighter-rouge">gulp</code> and <code class="language-plaintext highlighter-rouge">gulp-rename</code>. You can run the following commands to do so.</p>
<div class="language-bash highlighter-rouge"><div class="highlight"><pre class="highlight"><code>npm <span class="nb">install </span>gulp-cli <span class="nt">-g</span>
npm init
npm <span class="nb">install </span>gulp gulp-rename <span class="nt">--save-dev</span>
</code></pre></div></div>
<p>Next, install the prototype module that I created.</p>
<div class="language-bash highlighter-rouge"><div class="highlight"><pre class="highlight"><code>npm <span class="nb">install </span>gulp-sfdx-metadata <span class="nt">--save-dev</span>
</code></pre></div></div>
<p>Next, change the package path in your <code class="language-plaintext highlighter-rouge">sfdx-project.json</code> file to use the generated out folder.</p>
<div class="language-json highlighter-rouge"><div class="highlight"><pre class="highlight"><code><span class="nl">"packageDirectories"</span><span class="p">:</span><span class="w"> </span><span class="p">[</span><span class="w">
</span><span class="p">{</span><span class="w">
</span><span class="nl">"path"</span><span class="p">:</span><span class="w"> </span><span class="s2">"out/main/default"</span><span class="p">,</span><span class="w">
</span><span class="nl">"default"</span><span class="p">:</span><span class="w"> </span><span class="kc">true</span><span class="w">
</span><span class="p">}</span><span class="w">
</span><span class="p">]</span><span class="w">
</span></code></pre></div></div>
<p>Next, create a <code class="language-plaintext highlighter-rouge">gulpfile.js</code> at the root of your project and add the following contents.</p>
<div class="language-js highlighter-rouge"><div class="highlight"><pre class="highlight"><code><span class="kd">const</span> <span class="nx">gulp</span> <span class="o">=</span> <span class="nx">require</span><span class="p">(</span><span class="dl">"</span><span class="s2">gulp</span><span class="dl">"</span><span class="p">);</span>
<span class="kd">const</span> <span class="nx">rename</span> <span class="o">=</span> <span class="nx">require</span><span class="p">(</span><span class="dl">"</span><span class="s2">gulp-rename</span><span class="dl">"</span><span class="p">);</span>
<span class="kd">const</span> <span class="nx">sfdxMetadata</span> <span class="o">=</span> <span class="nx">require</span><span class="p">(</span><span class="dl">"</span><span class="s2">sfdx-gulp-metadata</span><span class="dl">"</span><span class="p">);</span>
<span class="kd">const</span> <span class="nx">sfdxProject</span> <span class="o">=</span> <span class="nx">require</span><span class="p">(</span><span class="dl">"</span><span class="s2">./sfdx-project</span><span class="dl">"</span><span class="p">);</span>
<span class="kd">const</span> <span class="nx">output</span> <span class="o">=</span> <span class="nx">sfdxProject</span><span class="p">.</span><span class="nx">packageDirectories</span><span class="p">[</span><span class="mi">0</span><span class="p">].</span><span class="nx">path</span><span class="p">;</span>
<span class="kd">const</span> <span class="nx">src</span> <span class="o">=</span> <span class="dl">"</span><span class="s2">src/</span><span class="dl">"</span><span class="p">;</span>
<span class="kd">const</span> <span class="nx">defaults</span> <span class="o">=</span> <span class="p">{</span>
<span class="na">apiVersion</span><span class="p">:</span> <span class="dl">"</span><span class="s2">39.0</span><span class="dl">"</span>
<span class="p">};</span>
<span class="kd">function</span> <span class="nx">addDefaultMetadata</span><span class="p">(</span><span class="nx">options</span><span class="p">)</span> <span class="p">{</span>
<span class="k">return</span> <span class="kd">function</span><span class="p">()</span> <span class="p">{</span>
<span class="k">return</span> <span class="nx">gulp</span>
<span class="p">.</span><span class="nx">src</span><span class="p">(</span><span class="s2">`</span><span class="p">${</span><span class="nx">src</span><span class="p">}${</span><span class="nx">options</span><span class="p">.</span><span class="nx">folder</span><span class="p">}</span><span class="s2">/*.</span><span class="p">${</span><span class="nx">options</span><span class="p">.</span><span class="nx">extension</span><span class="p">}</span><span class="s2">`</span><span class="p">)</span>
<span class="p">.</span><span class="nx">pipe</span><span class="p">(</span>
<span class="nx">sfdxMetadata</span><span class="p">({</span>
<span class="na">object</span><span class="p">:</span> <span class="nx">options</span><span class="p">.</span><span class="nx">object</span><span class="p">,</span>
<span class="na">metadata</span><span class="p">:</span> <span class="nx">options</span><span class="p">.</span><span class="nx">metadata</span>
<span class="p">})</span>
<span class="p">)</span>
<span class="p">.</span><span class="nx">pipe</span><span class="p">(</span>
<span class="nx">rename</span><span class="p">({</span>
<span class="na">suffix</span><span class="p">:</span> <span class="dl">"</span><span class="s2">-meta</span><span class="dl">"</span><span class="p">,</span>
<span class="na">extname</span><span class="p">:</span> <span class="dl">"</span><span class="s2">.xml</span><span class="dl">"</span>
<span class="p">})</span>
<span class="p">)</span>
<span class="p">.</span><span class="nx">pipe</span><span class="p">(</span><span class="nx">gulp</span><span class="p">.</span><span class="nx">dest</span><span class="p">(</span><span class="s2">`</span><span class="p">${</span><span class="nx">output</span><span class="p">}</span><span class="s2">/</span><span class="p">${</span><span class="nx">options</span><span class="p">.</span><span class="nx">folder</span><span class="p">}</span><span class="s2">`</span><span class="p">));</span>
<span class="p">};</span>
<span class="p">}</span>
<span class="nx">gulp</span><span class="p">.</span><span class="nx">task</span><span class="p">(</span><span class="dl">"</span><span class="s2">copy</span><span class="dl">"</span><span class="p">,</span> <span class="kd">function</span><span class="p">()</span> <span class="p">{</span>
<span class="k">return</span> <span class="nx">gulp</span><span class="p">.</span><span class="nx">src</span><span class="p">(</span><span class="dl">"</span><span class="s2">src/**/*</span><span class="dl">"</span><span class="p">).</span><span class="nx">pipe</span><span class="p">(</span><span class="nx">gulp</span><span class="p">.</span><span class="nx">dest</span><span class="p">(</span><span class="nx">output</span><span class="p">));</span>
<span class="p">});</span>
<span class="nx">gulp</span><span class="p">.</span><span class="nx">task</span><span class="p">(</span>
<span class="dl">"</span><span class="s2">class</span><span class="dl">"</span><span class="p">,</span>
<span class="nx">addDefaultMetadata</span><span class="p">({</span>
<span class="na">folder</span><span class="p">:</span> <span class="dl">"</span><span class="s2">classes</span><span class="dl">"</span><span class="p">,</span>
<span class="na">extension</span><span class="p">:</span> <span class="dl">"</span><span class="s2">cls</span><span class="dl">"</span><span class="p">,</span>
<span class="na">object</span><span class="p">:</span> <span class="dl">"</span><span class="s2">ApexClass</span><span class="dl">"</span><span class="p">,</span>
<span class="na">metadata</span><span class="p">:</span> <span class="p">{</span>
<span class="na">apiVersion</span><span class="p">:</span> <span class="nx">defaults</span><span class="p">.</span><span class="nx">apiVersion</span><span class="p">,</span>
<span class="na">status</span><span class="p">:</span> <span class="dl">"</span><span class="s2">Active</span><span class="dl">"</span>
<span class="p">}</span>
<span class="p">})</span>
<span class="p">);</span>
<span class="nx">gulp</span><span class="p">.</span><span class="nx">task</span><span class="p">(</span>
<span class="dl">"</span><span class="s2">trigger</span><span class="dl">"</span><span class="p">,</span>
<span class="nx">addDefaultMetadata</span><span class="p">({</span>
<span class="na">folder</span><span class="p">:</span> <span class="dl">"</span><span class="s2">triggers</span><span class="dl">"</span><span class="p">,</span>
<span class="na">extension</span><span class="p">:</span> <span class="dl">"</span><span class="s2">trigger</span><span class="dl">"</span><span class="p">,</span>
<span class="na">object</span><span class="p">:</span> <span class="dl">"</span><span class="s2">ApexTrigger</span><span class="dl">"</span><span class="p">,</span>
<span class="na">metadata</span><span class="p">:</span> <span class="p">{</span>
<span class="na">apiVersion</span><span class="p">:</span> <span class="nx">defaults</span><span class="p">.</span><span class="nx">apiVersion</span><span class="p">,</span>
<span class="na">status</span><span class="p">:</span> <span class="dl">"</span><span class="s2">Active</span><span class="dl">"</span>
<span class="p">}</span>
<span class="p">})</span>
<span class="p">);</span>
<span class="nx">gulp</span><span class="p">.</span><span class="nx">task</span><span class="p">(</span>
<span class="dl">"</span><span class="s2">page</span><span class="dl">"</span><span class="p">,</span>
<span class="nx">addDefaultMetadata</span><span class="p">({</span>
<span class="na">folder</span><span class="p">:</span> <span class="dl">"</span><span class="s2">pages</span><span class="dl">"</span><span class="p">,</span>
<span class="na">extension</span><span class="p">:</span> <span class="dl">"</span><span class="s2">page</span><span class="dl">"</span><span class="p">,</span>
<span class="na">object</span><span class="p">:</span> <span class="dl">"</span><span class="s2">ApexPage</span><span class="dl">"</span><span class="p">,</span>
<span class="na">metadata</span><span class="p">:</span> <span class="p">{</span>
<span class="na">apiVersion</span><span class="p">:</span> <span class="nx">defaults</span><span class="p">.</span><span class="nx">apiVersion</span><span class="p">,</span>
<span class="na">availableInTouch</span><span class="p">:</span> <span class="kc">false</span><span class="p">,</span>
<span class="na">confirmationTokenRequired</span><span class="p">:</span> <span class="kc">false</span><span class="p">,</span>
<span class="na">label</span><span class="p">:</span> <span class="dl">"</span><span class="s2">${name}</span><span class="dl">"</span>
<span class="p">}</span>
<span class="p">})</span>
<span class="p">);</span>
<span class="nx">gulp</span><span class="p">.</span><span class="nx">task</span><span class="p">(</span><span class="dl">"</span><span class="s2">build</span><span class="dl">"</span><span class="p">,</span> <span class="p">[</span><span class="dl">"</span><span class="s2">copy</span><span class="dl">"</span><span class="p">,</span> <span class="dl">"</span><span class="s2">class</span><span class="dl">"</span><span class="p">,</span> <span class="dl">"</span><span class="s2">trigger</span><span class="dl">"</span><span class="p">,</span> <span class="dl">"</span><span class="s2">page</span><span class="dl">"</span><span class="p">]);</span>
</code></pre></div></div>
<p>You can see how in this file we are actually specifying default values for metadata that apply to every <code class="language-plaintext highlighter-rouge">ApexPage</code>, <code class="language-plaintext highlighter-rouge">ApexTrigger</code>, and <code class="language-plaintext highlighter-rouge">ApexClass</code>. Now you can go and delete all of the corresponding <code class="language-plaintext highlighter-rouge">-meta.xml</code> files for those objects.</p>
<p>In order to generate the output of your project before you push or create a package simply run the gulp build command as shown.</p>
<div class="language-bash highlighter-rouge"><div class="highlight"><pre class="highlight"><code>gulp build
</code></pre></div></div>
<p>This will generate your code to the <code class="language-plaintext highlighter-rouge">out</code> folder where it will have all the appropriate metadata files.</p>
<h2 id="next-steps">Next Steps</h2>
<p>As I mentioned, this is a prototype. It shouldn’t be used in a real app. There are lots of things missing such as:</p>
<ul>
<li>Ability to pull code and merge back into <code class="language-plaintext highlighter-rouge">src</code></li>
<li>Ability to override metadata for specific objects</li>
<li>Simplify the <code class="language-plaintext highlighter-rouge">gulpfile.js</code> configuration</li>
<li>Testing of really any kind. :)</li>
</ul>
<p>You can see the <a href="https://github.com/ntotten/gulp-sfdx-metadata">full source and example on Github</a>.</p>
<p>So if you find this concept to be worthwhile let me know. What would you like to see this do? Does it make sense? Is it useful?</p>I have recently been thinking about how metadata surfaces in SFDX projects and how we might be able to simplify the experience. One thing that bothers me is that there is tons of redundancy with the -meta.xml files. For example, a project with 50 Apex classes will have 50 -meta.xml files that are almost always exactly the same. This makes things like changing the API version for every class cumbersome. Additionally, it means that rather than right clicking a folder and creating a new MyClass.cls file to create an Apex class you either have to use the CLI or copy and paste a bunch of XML from another class.Using Nodemon to Automatically Push SFDX Project Changes2018-01-17T00:00:00+00:002018-01-17T00:00:00+00:00https://ntotten.com/2018/01/17/using-nodemon-to-autopush-sfdx-project-changes<p>Several people have asked if it was possible to have changes to your local files automatically pushed to your scratch org when you save. This can be helpful if you are making small changes to things like CSS and need to test the output in the browser quickly.
Fortunately, there is easy using a tool called <a href="https://nodemon.io/">nodemon</a> that can solve this problem. Nodemon allows developers to monitor a folder for file changes of all or some file types and then respond by running a script. In our case, we can use this to watch the app’s source folder and run the SFDX CLI to push code changes on file saves.</p>
<p>To start, you will need to install nodemon. Installation can be done quickly using npm. If you don’t already have <a href="https://nodejs.org/en/">node.js</a> installed on your computer, you will need to do this first.</p>
<p>If you don’t already have a <code class="language-plaintext highlighter-rouge">package.json</code> file in your project you will need to create one using the command below in the root of your project. You can accept all the defaults.</p>
<div class="language-bash highlighter-rouge"><div class="highlight"><pre class="highlight"><code><span class="nv">$ </span>npm init
</code></pre></div></div>
<p>Next, install nodemon by running the following command.</p>
<div class="language-bash highlighter-rouge"><div class="highlight"><pre class="highlight"><code><span class="nv">$ </span>npm <span class="nb">install </span>nodemon <span class="nt">--save-dev</span>
</code></pre></div></div>
<p>Next, you will need to edit your <code class="language-plaintext highlighter-rouge">package.json</code> file and add a new section called <code class="language-plaintext highlighter-rouge">nodemonConfig</code>.</p>
<div class="language-json highlighter-rouge"><div class="highlight"><pre class="highlight"><code><span class="nl">"nodemonConfig"</span><span class="p">:</span><span class="w"> </span><span class="p">{</span><span class="w">
</span><span class="nl">"watch"</span><span class="p">:</span><span class="w"> </span><span class="p">[</span><span class="s2">"force-app"</span><span class="p">],</span><span class="w">
</span><span class="nl">"exec"</span><span class="p">:</span><span class="w"> </span><span class="s2">"sfdx force:source:push"</span><span class="p">,</span><span class="w">
</span><span class="nl">"ext"</span><span class="p">:</span><span class="w"> </span><span class="s2">"cls,xml,json,js,trigger,cpm,css,design,svg"</span><span class="p">,</span><span class="w">
</span><span class="nl">"delay"</span><span class="p">:</span><span class="w"> </span><span class="s2">"2500"</span><span class="w">
</span><span class="p">}</span><span class="w">
</span></code></pre></div></div>
<p>You can read more about the config of nodemon <a href="https://github.com/remy/nodemon">here</a>, but basically what you need to know is that <code class="language-plaintext highlighter-rouge">watch</code> specifies the folder to monitor, in this case <code class="language-plaintext highlighter-rouge">force-app</code>, <code class="language-plaintext highlighter-rouge">exec</code> is the script that is run, <code class="language-plaintext highlighter-rouge">ext</code> is the file extensions to monitor, and <code class="language-plaintext highlighter-rouge">delay</code> is the time in milliseconds to wait between saves. The delay is useful if you same multiple files quickly so that ideally all files are pushed at the same time.</p>
<p>Finally, when you want to enable auto-push on save simply run <code class="language-plaintext highlighter-rouge">npx nodemon</code> in the command line. It will run continuously until you stop it.</p>Several people have asked if it was possible to have changes to your local files automatically pushed to your scratch org when you save. This can be helpful if you are making small changes to things like CSS and need to test the output in the browser quickly. Fortunately, there is easy using a tool called nodemon that can solve this problem. Nodemon allows developers to monitor a folder for file changes of all or some file types and then respond by running a script. In our case, we can use this to watch the app’s source folder and run the SFDX CLI to push code changes on file saves.Using Synology as a Reverse Proxy2017-08-06T00:00:00+00:002017-08-06T00:00:00+00:00https://ntotten.com/2017/08/06/using-synology-as-a-reverse-proxy<p>I just learned that Synology comes with a reverse proxy powered by Nginx. I thought it would be cool to setup the reverse proxy to my Unifi Controller so that I could host the controller on a nice domain name and give it a valid SSL certificate with Let’s encrypt. The process was a bit more complex than I had anticipated, but in the end it gives a nice result.</p>
<p>Before we start I am assuming you already have Let’s Encrypt setup on your Synology to access your Synology desktop. This requires you to have a domain and have setup port forwarding in your router.</p>
<h2 id="dns-server">DNS Server</h2>
<p>So the first thing we will want to do is setup our DNS. Even if you aren’t going to access these services externally you still need a valid DNS entry to get a certificate. Configure your DNS Server with a CNAME or A record to point your new subdomain to your Synology.</p>
<p>I have <code class="language-plaintext highlighter-rouge">synology.example.com</code> setup for my Synology so I created <code class="language-plaintext highlighter-rouge">unifi.example.com</code> as a CNAME to use as the domain for my Unifi Controller.</p>
<p>In order to resolve the domains to local addresses and to avoid exposing these services to the internet I am going to setup my Synology NAS to also be the DNS server on my network. To do this you will need to install the DNS package if you haven’t already done so.</p>
<p>Before we use the DNS server on our local network we need to set it up for DNS forwarding. Do so by configuring the following settings in the Synology DNS Server. Note, I am using OpenDNS nameservers, but you can use any public DNS.</p>
<p><img src="/images/2017/08/dns-forwarding.png" alt="DNS Forwarding" /></p>
<p>Now you will need to set your router’s DHCP server to provide the IP address of your Synology as the DNS server rather than a public DNS or the router’s IP address. This varies by router so instructions aren’t included here.</p>
<p>After you setup your router and ensured your local computer is using Synology DNS you should still have a correctly functioning internet connection. If not, something has gone wrong.</p>
<p>Next, we will setup the Synology DNS to provide local addresses for our devices so we don’t have to go through our router’s public connection and open up more ports. We will just keep these services local to our private network. Back in the DNS Server configuration you will create a Master Zone.</p>
<blockquote>
<p>Note, there are two ways you can do this. If you want to override all of the DNS entries for your entire domain you can create a master zone for your domain like <code class="language-plaintext highlighter-rouge">example.com</code> However, if you only want to override certain entries like <code class="language-plaintext highlighter-rouge">unifi.example.com</code> you can create a Master Zone for just the subdomains.</p>
</blockquote>
<p><img src="/images/2017/08/create-master-zone.png" alt="Create Master Zone" /></p>
<p>Next, you need to create a record for the zone. If you are just overriding the subdomain you would create a A Record pointing the zone root. To open this right click on the zone you just created and select <code class="language-plaintext highlighter-rouge">Resource Record</code>. In that dialog select <code class="language-plaintext highlighter-rouge">Create</code> and click <code class="language-plaintext highlighter-rouge">A Type</code>. Leave the name field blank and enter the local IP address of your app’s server.</p>
<p><img src="/images/2017/08/resource-record.png" alt="Resource Record" /></p>
<p>You will need to create a zone and record for each subdomain you are creating. Typically, you would do this for the Synology itself and other apps like the Unifi Controller.</p>
<h2 id="web-station">Web Station</h2>
<p>Next, if you haven’t already done so install the Web Station package.</p>
<p><img src="/images/2017/08/web-station.png" alt="Web Station" /></p>
<p>The first thing that will happen when you enable Web Station is your default device url will no longer redirect you to the correct port of your device because a new page is hosted there. To fix that I enabled PHP on the default site and create <code class="language-plaintext highlighter-rouge">index.php</code> that does this redirect for me. This is optional depending on what you want to do with your default site.</p>
<p>To enable PHP open Web Station and go to <code class="language-plaintext highlighter-rouge">General Settings</code> then select a PHP version from the drop down. Then connect to your device via SSH do the following.</p>
<div class="language-bash highlighter-rouge"><div class="highlight"><pre class="highlight"><code><span class="o">></span> <span class="nb">cd</span> /volume1/web/
<span class="o">></span> <span class="nb">rm </span>index.html
<span class="o">></span> vi index.php
</code></pre></div></div>
<p>Set the contents of the file to the following. Setting the domain and port to whatever your synology device runs on.</p>
<div class="language-php highlighter-rouge"><div class="highlight"><pre class="highlight"><code><span class="cp"><?php</span>
<span class="nb">header</span><span class="p">(</span><span class="s1">'Location: https://synology.example.com:5001'</span><span class="p">);</span>
<span class="cp">?></span>
</code></pre></div></div>
<p><a href="https://stackoverflow.com/questions/11828270/how-to-exit-the-vim-editor">Save the file</a> and test it out by going to the domain.
Now, if you type in synology.example.com you should be redirected to the correct port.</p>
<p>You also need to create a virtual server for each subdomain you want to create certificates for. To do so open the <code class="language-plaintext highlighter-rouge">Virtual Host</code> tab in Web Station and click create. You will want to create a new folder for each virtual host you are creating.</p>
<p><img src="/images/2017/08/virtual-host.png" alt="Virtual Host" /></p>
<p>At this point if you navigate to your host (<code class="language-plaintext highlighter-rouge">unifi.example.com</code>) in your browser you should see first a certificate error (we will fix that next) and after you pass that you should get the default Synology landing page.</p>
<p>We will also want to create a redirect here to send us to the right port on whatever device we are using. Similar to what we did above navigate to the folder you created for this virtual host and create an <code class="language-plaintext highlighter-rouge">index.php</code> file to redirect to the right url/port. Make sure to delete the <code class="language-plaintext highlighter-rouge">index.html</code> file too.</p>
<h2 id="application-portal">Application Portal</h2>
<p>Next, we will setup Nginx on the Synology as a reverse proxy to our app’s server. To do this open the <code class="language-plaintext highlighter-rouge">Control Panel</code> and navigate to <code class="language-plaintext highlighter-rouge">Application Portal</code> then open the <code class="language-plaintext highlighter-rouge">Reverse Proxy</code> tab. Set the host to your application’s subdomain and set the ports as required.</p>
<p><img src="/images/2017/08/reverse-proxy.png" alt="Reverse Proxy" /></p>
<h2 id="certificate">Certificate</h2>
<p>Finally, we need to create a certificate for our new subdomain. Open the <code class="language-plaintext highlighter-rouge">Control Panel</code> and navigate to <code class="language-plaintext highlighter-rouge">Security</code> and open the <code class="language-plaintext highlighter-rouge">Certificate</code> tab. Click <code class="language-plaintext highlighter-rouge">Add</code> and set the options for your certificate using Let’s Encrypt. The domain name should be the same as the subdomain you are using for your app such as <code class="language-plaintext highlighter-rouge">unifi.example.com</code></p>
<p><img src="/images/2017/08/certificate.png" alt="Certificate" /></p>
<p>If you get an error creating the certificate is it likely that port 80 is not being forwarded correctly. One thing to note with Synology is that you shouldn’t try to remap ports unless you really know what you are doing.</p>
<p>The last step is to map the correct certificate to the correct application. To do this open the <code class="language-plaintext highlighter-rouge">Configure</code> settings and set the each host to the correct certificate.</p>
<blockquote>
<p>Note, some applications may require web sockets. Unforutnately, this isn’t support out of the box but you can make it work as shown in <a href="https://github.com/orobardet/dsm-reverse-proxy-websocket">these instructions</a></p>
</blockquote>
<p><img src="/images/2017/08/certificate-configure.png" alt="Certificate Configuration" /></p>
<h2 id="wrapup">Wrapup</h2>
<p>At this point you should be able to load your application and it should have a valid SSL certificate. One thing that is probably possible is to remap ports and use 80 or 443 instead of whatever port your application uses by default. I haven’t tried this, but I suspect that if you use port 80 there might be a problem creating the Let’s Encrypt certificates as those require serving a file on port 80. This can probably be overcome by manually editing the Nginx configuration, but I didn’t go down that route.</p>
<p>Let me know if you have any questions or feedback.</p>I just learned that Synology comes with a reverse proxy powered by Nginx. I thought it would be cool to setup the reverse proxy to my Unifi Controller so that I could host the controller on a nice domain name and give it a valid SSL certificate with Let’s encrypt. The process was a bit more complex than I had anticipated, but in the end it gives a nice result.Disable Auto-shutoff on the Bose Soundtouch2017-01-19T00:00:00+00:002017-01-19T00:00:00+00:00https://ntotten.com/2017/01/19/disable-auto-shutoff-on-bose-soundtouch<p>This is a pretty short post, but I wanted to document it mostly for my own purposes. I have a Bose SoundTouch 20 ii which has an AUX input. I have my Amazon Echo Dot plugged into it, but the SoundTouch has a default to auto-shutoff after 20 minutes which obviously isn’t great for a voice activated device.</p>
<p>Bose recently released an update to the SoundTouch models with bluetooth to disable this feature, but unfortunately doesn’t provide a way to disable auto-shutoff on AUX. Fortunately, the the device can be <a href="http://flarn2006.blogspot.co.uk/2014/09/hacking-bose-soundtouch-and-its-linux.html">controlled via telnet</a> and you can change this setting.</p>
<p>Disabling auto-shutoff can by connecting via telnet to your device and running a single command.</p>
<div class="language-plaintext highlighter-rouge"><div class="highlight"><pre class="highlight"><code>> telnet 192.168.X.X 17000
> sys timeout inactivity disable
> exit
</code></pre></div></div>This is a pretty short post, but I wanted to document it mostly for my own purposes. I have a Bose SoundTouch 20 ii which has an AUX input. I have my Amazon Echo Dot plugged into it, but the SoundTouch has a default to auto-shutoff after 20 minutes which obviously isn’t great for a voice activated device.The Perfect Home Network2016-03-22T00:00:00+00:002016-03-22T00:00:00+00:00https://ntotten.com/2016/03/22/the-perfect-home-network<p>Periodically, I have this same conversation with people about how to build a really great wired and wireless network in their house. I recommend a few products to them and the response is always the same - “those are pretty expensive, can’t I just use XYZ from Best Buy?” My answer is that, yes, of course you can use any random home router from Best Buy for $80, but it isn’t going to be great. The simple fact is that, like most things in life, if you want something that is great you are going to have to spend a little extra money.</p>
<p>So really, it is a question of what you want. On one hand you can buy any random wireless router for $80-$120 and you can get by. However, you are going to have problems. Your husband/wife/children are going to tell you “internet isn’t working” periodically and you are going to have to go “unplug the router”. Your wifi will be spotty in parts of your house and the speed may not be that great. But you saved a few bucks so that’s the tradeoff.</p>
<p>On the other hand you can do it right. Depending on the size of your house you can build a fantastic network for between $300 and $500. With this investment you are going to get a network that has nearly 100% uptime. You aren’t going to need to “reset the router” or deal with poor speed and spotty connectivity.</p>
<p>Below is my current recommendation for the “perfect” home network. Fair warning, I am not a network engineer. I am just an enthusiast who has tried a bunch of things and found something that works well for me.</p>
<h2 id="router">Router</h2>
<p>You want a separate router. Don’t even think about buying a router + access point + coffee maker type device. They are crap, don’t do it. Additionally, you usually want your tangle of wires to be in a closet or off to some corner of the office - this is exactly where you DON’T WANT your access point.</p>
<p>My current recommendation for a router is the <a href="https://www.ubnt.com/unifi-routing/usg/">Unifi Security Gateway</a> (Model USG). This is an awesome and versatile router. It has all the features a networking junkie would want, but it is easy enough for most anyone (at least who is reading this) to setup. It integrates with the Unifi control software. It has some extras that you might use like the ability to fail over to a second internet service provider if you need extra reliability.</p>
<p><img src="/images/2016/03/usg.png" alt="" /></p>
<h2 id="switch">Switch</h2>
<p>I have two Unifi switches. One in my main wiring closet and one in my home theater closet so that all my video devices are hard wired. They are fantastic and they provide a completely unified management experience with the Unifi Controller. I would recommend the <a href="https://www.ubnt.com/unifi-switching/unifi-switch-8-150w/">powered 8 port switch</a></p>
<p><img src="/images/2016/03/unifi_switch.png" alt="" /></p>
<h2 id="access-points">Access Points</h2>
<p>This part is important. If you want a good wireless network, don’t go cheap on this part. First off some basics. There are different protocols for wireless access points. New computers and phones support <a href="https://en.wikipedia.org/wiki/IEEE_802.11ac">802.11ac</a>. You want this. AC wireless is faster than the old protocols like N, B, G, etc.</p>
<p>In addition to the protocol, there is another hugely important aspect of access points. This is the ability to support roaming. Roaming means that your device (phone, laptop) can stay connected while moving between different access points. This happens both when you physically move locations and also for various other reasons that I won’t pretend to understand. I don’t know really why this is, but cheap access points are terrible at roaming. If you try to setup two or more of basically any home access point things are going to not work well. This includes any Linksys, Netgear, and even Apple routers that I have ever tried.</p>
<p>In my experience, home access points can NEVER be successfully used in an configuration more than 1. This includes even Apple AirPorts which they claim support this feature - trust me I have tried, it doesn’t work.</p>
<blockquote>
<p>NOTE: Wireless technology gets better over time. I’m sorry to break it to you but if you want the best, you will need to replace your access points every few years. :)</p>
</blockquote>
<p>So which access point should you get? My current recommendations is the <a href="https://www.ubnt.com/unifi/unifi-ap-ac-pro/">Ubiquiti UniFi AP AC PRO</a> (Model UAP‑AC‑PRO). This thing is super fast, and incredibly reliable, and can be used successfully in multiple access point environments. One really nice thing also about these devices is that they are pretty low profile and they support PoE. This makes it easy to place them in the right spot in your house, not right next to the cable modem in the office. They come with the PoE adapters, but if you have a PoE router or switch you won’t need the adapter.</p>
<blockquote>
<p>If you want to save some money, the <a href="https://www.ubnt.com/unifi/unifi-ap-ac-lite/">Ubiquiti Unifi AP AC Lite</a> is also a very good option. It might take a few more of these to cover your house and if you have tons of devices in one place it might suffer a bit, but this is still a very good access point for a lower price.</p>
</blockquote>
<p>Additionally, you will need to hard-wire each access point, so if your house isn’t wired for ethernet I would suggest running some cat6 cable to a central location of your house for optimal signal. Because they are very clean looking, I actually ran wires to mount these on the ceiling in my house. This made them perfectly centrally located and gave unobstructed paths to most of the house. They really aren’t any more noticeable than a smoke detector.</p>
<p>For most houses, I would probably recommend getting two access points. If your house is really big or spread out you might need more. Each access point runs about $150 each so they aren’t super cheap, but they are worth it.</p>
<p><img src="/images/2016/03/unifi_ap.jpg" alt="" /></p>
<h2 id="control-software">Control Software</h2>
<p>The UniFi access points don’t have onboard setup software like most of your home routers do. Instead they are managed centrally by custom UniFi software. This allows you to easily setup multiple access points at the same time and ensures they all work seamlessly together.</p>
<p>One thing of note, for some unfortunate reason the UniFi controller software requires Java on your computer. I hate this. Fortunately, there is a nice way around this. Ubiquiti actually makes a little device called the <a href="https://www.ubnt.com/unifi/unifi-cloud-key/">Cloud Key</a> that runs the control software. You simply plug this device into a PoE port on your router and it will allow you to manage your wireless network. I haven’t actually used this, but I did order one and it should arrive in the next few days. I am excited to remove Java from my computer.</p>
<p><img src="/images/2016/03/cloud_key.jpg" alt="" /></p>
<h2 id="power-backup">Power Backup</h2>
<p>One other thing that might be worth adding depending on where you live is a simple UPC backup for your router, switch, and modem. This will keep everything humming along in the event of a power outage or blown fuse. Certainly not needed, but it will help you achieve 100% uptime.</p>
<h2 id="multiple-isps">Multiple ISPs</h2>
<p>I work from home most days so having the internet is critical for me to get my work done. As such, I have two internet service providers that I have configured for load balancing and failover. This means that if any one service goes down, my internet usage goes without interruption. I personally have Comcast Cable 105mbps and Centurylink Fiber 40mbps (both are the max available in my area). While both of these connections are reasonably reliable, they probably really only provide about 99% SLA at best (I monitor each of them). On their own this would leave me with a total of several days of downtime per year which is not acceptable. Having my dual ISP setup provides me with near 100% internet uptime.</p>
<h2 id="conclusion">Conclusion</h2>
<p>Hopefully this helps you with your home networking questions. As with most things in life, if you want something done well it is going to take a little more effort and a little more money, but I think you will find it to be worth it.</p>Periodically, I have this same conversation with people about how to build a really great wired and wireless network in their house. I recommend a few products to them and the response is always the same - “those are pretty expensive, can’t I just use XYZ from Best Buy?” My answer is that, yes, of course you can use any random home router from Best Buy for $80, but it isn’t going to be great. The simple fact is that, like most things in life, if you want something that is great you are going to have to spend a little extra money.Using Jenkins to Detect Broken Links on Your Site2015-08-04T00:00:00+00:002015-08-04T00:00:00+00:00https://ntotten.com/2015/08/04/using-jenkins-to-detect-broken-links-on-your-site<p>One of the most basic aspects of building a great website and keeping your customers happy is ensuring that your links work. I know this seems obviously, but you would be surprised at how many products and documentation sites don’t bother with this leaving their content littered with links to 404s.</p>
<p>At <a href="https://auth0.com">Auth0</a> we setup a simple Jenkins task to scan our entire site for broken and malformed links once a day using the very handy <a href="http://wummel.github.io/linkchecker/">LinkChecker</a> tool by <a href="https://github.com/wummel">Bastian Kleineidam</a>.</p>
<p>The first thing you will need to do is setup linkchecker on your Jenkins machine. The easiest way to do this is to just install it globally as shown below. You will need SSH access to Jenkins for this step and you will need to install the python-dev package if it isn’t already installed. (Note, this step assumes Jenkins is running on Linux - this will also work on Windows, but with slightly different installation).</p>
<div class="language-bash highlighter-rouge"><div class="highlight"><pre class="highlight"><code><span class="nb">sudo </span>apt-get <span class="nb">install </span>python-dev
<span class="nb">sudo </span>pip <span class="nb">install </span>LinkChecker
</code></pre></div></div>
<p>To setup your build in Jenkins simply create a “New Item” and select “Freestyle Project”. Name the project whatever you like.</p>
<p>Configure the project with a few basic settings. Under build triggers, check “Build Periodically” and set a cron schedule like <code class="language-plaintext highlighter-rouge">H 0 * * *</code>.</p>
<p><img src="/images/2015/08/jenkins-build-triggers.png" alt="Jenkins Build Triggers" /></p>
<p>Next, set add a build step for “Execute Shell” and add the command to run linkchecker.</p>
<div class="language-bash highlighter-rouge"><div class="highlight"><pre class="highlight"><code>linkchecker https://example.com
</code></pre></div></div>
<p>See the <a href="http://wummel.github.io/linkchecker/man1/linkchecker.1.html">documentation on link checker</a> for additional configuration on the CLI.</p>
<p>Set your desired notification preferences such as email or Slack when the build fails.</p>
<p>Save your configuration and run your project. The console output will show you if you have a broken link on your site like this.</p>
<p><img src="/images/2015/08/jenkins-broken-link-console.png" alt="Jenkins Console Output" /></p>
<p>Now you are set to provide a more usable site for your readers or customers.</p>One of the most basic aspects of building a great website and keeping your customers happy is ensuring that your links work. I know this seems obviously, but you would be surprised at how many products and documentation sites don’t bother with this leaving their content littered with links to 404s.Sublime Text Setup Script2014-05-09T00:00:00+00:002014-05-09T00:00:00+00:00https://ntotten.com/2014/05/09/sublime-setup-script<p>One thing that I find odd about the default Sublime Text install on Windows is that you don’t get the option to add subl to the path. On OS X this happens automagically. I wrote a simple script that I use on every new Windows machine to setup sublime the way I like. In addition to adding subl to the path, this also copies my sublime settings. Pretty simple script, but I find it useful.</p>
<div class="language-powershell highlighter-rouge"><div class="highlight"><pre class="highlight"><code><span class="c"># Make link to subl and add to path</span><span class="w">
</span><span class="n">cmd</span><span class="w"> </span><span class="nx">/c</span><span class="w"> </span><span class="nx">mklink</span><span class="w"> </span><span class="s2">"C:\Program Files\Sublime Text 3\subl.exe"</span><span class="w"> </span><span class="s2">"C:\Program Files\Sublime Text 3\sublime_text.exe"</span><span class="w">
</span><span class="nv">$wsh</span><span class="w"> </span><span class="o">=</span><span class="w"> </span><span class="n">new-object</span><span class="w"> </span><span class="nt">-com</span><span class="w"> </span><span class="nx">wscript.shell</span><span class="w">
</span><span class="nv">$path</span><span class="w"> </span><span class="o">=</span><span class="w"> </span><span class="nv">$wsh</span><span class="o">.</span><span class="nf">Environment</span><span class="p">(</span><span class="s2">"System"</span><span class="p">)</span><span class="o">.</span><span class="nf">Item</span><span class="p">(</span><span class="s2">"Path"</span><span class="p">)</span><span class="w">
</span><span class="nv">$subl</span><span class="w"> </span><span class="o">=</span><span class="w"> </span><span class="s2">";C:\Program Files\Sublime Text 3\"</span><span class="p">;</span><span class="w">
</span><span class="kr">If</span><span class="w"> </span><span class="p">(</span><span class="nv">$path</span><span class="o">.</span><span class="nf">Contains</span><span class="p">(</span><span class="nv">$subl</span><span class="p">))</span><span class="w"> </span><span class="p">{</span><span class="w">
</span><span class="n">echo</span><span class="w"> </span><span class="s2">"Sublime Text already in PATH"</span><span class="p">;</span><span class="w">
</span><span class="p">}</span><span class="w"> </span><span class="kr">Else</span><span class="w"> </span><span class="p">{</span><span class="w">
</span><span class="nv">$path</span><span class="w"> </span><span class="o">+=</span><span class="w"> </span><span class="s2">";C:\Program Files\Sublime Text 3\"</span><span class="w">
</span><span class="nv">$wsh</span><span class="o">.</span><span class="nf">Environment</span><span class="p">(</span><span class="s2">"System"</span><span class="p">)</span><span class="o">.</span><span class="nf">Item</span><span class="p">(</span><span class="s2">"Path"</span><span class="p">)</span><span class="w"> </span><span class="o">=</span><span class="w"> </span><span class="nv">$path</span><span class="w">
</span><span class="n">echo</span><span class="w"> </span><span class="s2">"Added subl.exe to path"</span><span class="p">;</span><span class="w">
</span><span class="p">}</span><span class="w">
</span><span class="c"># Save Sublime Settings</span><span class="w">
</span><span class="n">Copy-Item</span><span class="w"> </span><span class="nx">Preferences.sublime-settings</span><span class="w"> </span><span class="s2">"</span><span class="nv">$</span><span class="nn">Env</span><span class="p">:</span><span class="nv">USERPROFILE</span><span class="s2">\AppData\Roaming\Sublime Text 3\Packages\User"</span><span class="w">
</span><span class="n">Copy-Item</span><span class="w"> </span><span class="nx">XML.sublime-settings</span><span class="w"> </span><span class="s2">"</span><span class="nv">$</span><span class="nn">Env</span><span class="p">:</span><span class="nv">USERPROFILE</span><span class="s2">\AppData\Roaming\Sublime Text 3\Packages\User"</span><span class="w">
</span><span class="n">echo</span><span class="w"> </span><span class="s2">"Add Sublime Settings"</span><span class="p">;</span><span class="w">
</span></code></pre></div></div>One thing that I find odd about the default Sublime Text install on Windows is that you don’t get the option to add subl to the path. On OS X this happens automagically. I wrote a simple script that I use on every new Windows machine to setup sublime the way I like. In addition to adding subl to the path, this also copies my sublime settings. Pretty simple script, but I find it useful.