Implementing a Simple Registration Code Check in ASP.NET MVC
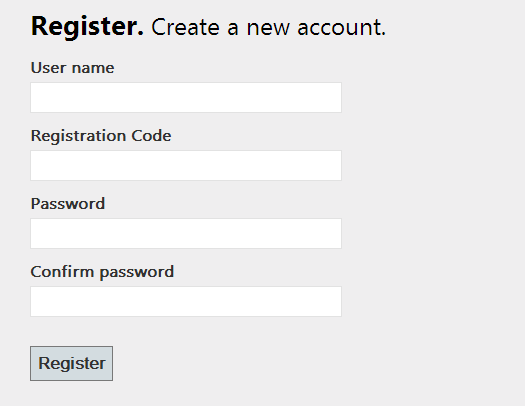
I was building a simple web app a few days ago and needed a way to control who could register to use the site. I didn’t really want to build a fancy invitation system nor did I want to add all of the user accounts manually. I solved this problem by creating a very simple registration code mechanism that would check if a user provided the valid code when registering either the traditional way (username and password) or when logging in with their Facebook or other OAuth account.
The result is a simple check that lets me control who is allowed to register to use my site. Obviously this isn’t foolproof and I have to trust my friends not to share the registration code, but this is a good enough solution for what I am building.
Below you will see how to add this simple check to your application with just a few lines of code.
To handle the actual validation I am going to use data annotations. This way, the places in my application that already check for a valid state will continue to operate without modification. This simply adds another check. This means I can implement this without touching a line of code in my AccountController. The first thing we need to do is create our validator. This simple validator will check the registration code that is provided with a registration code stored in my AppSettings.
public class ValidRegistrationCodeAttribute : ValidationAttribute
{

  public ValidRegistrationCodeAttribute()
  {
    this.ErrorMessage = "Invalid registration code.";
  }

  public override bool IsValid(object value)
  {
    if (value == null) return false;
    // In this example, I am storing my registration code in the web.conf file.
    // You can store the code however you like including web.config or a database.
    var validCode = ConfigurationManager.AppSettings["RegistrationCode"];
    return validCode.Equals(value.ToString());
  }

}
Next, add the RegistrationCode property to the RegisterExternalLoginModel and RegisterModel classes found in Models/AccountModels.cs. Include the ValidRegistratoinCode and other attributes as well.
RegisterModel.cs:
public class RegisterModel
{
  [Required]
  [Display(Name = "User name")]
  public string UserName { get; set; }

  [Required]
  [ValidRegistrationCode]
  [Display(Name = "Registration Code")]
  public string RegistrationCode { get; set; }

  [Required]
  [StringLength(100, ErrorMessage = "The {0} must be at least {2} characters long.", MinimumLength = 6)]
  [DataType(DataType.Password)]
  [Display(Name = "Password")]
  public string Password { get; set; }

  [DataType(DataType.Password)]
  [Display(Name = "Confirm password")]
  [Compare("Password", ErrorMessage = "The password and confirmation password do not match.")]
  public string ConfirmPassword { get; set; }
}
RegisterExternalLoginModel.cs:
public class RegisterExternalLoginModel
{
  [Required]
  [Display(Name = "User name")]
  public string UserName { get; set; }

  [Required]
  [ValidRegistrationCode]
  [Display(Name = "Registration Code")]
  public string RegistrationCode { get; set; }

  public string ExternalLoginData { get; set; }
}
This is everything that needs to be done from a code prospective. The last changes are just to add the registration code field to our registration views. You will need to modify two views. The first is the Account/Register.cshtml view. Add the lines for the RegistrationCode directly below the Username code as show below.
<li>
  @Html.LabelFor(m => m.UserName)
  @Html.TextBoxFor(m => m.UserName)
</li>
<li>
  @Html.LabelFor(m => m.RegistrationCode)
  @Html.TextBoxFor(m => m.RegistrationCode)
</li>
<li>
  @Html.LabelFor(m => m.Password)
  @Html.PasswordFor(m => m.Password)
</li>
Next, add the lines for the RegistrationCode directly below the Username code in the Account/ExternalLoginConfirmation.cshtml view as shown.
<li class="name">
  @Html.LabelFor(m => m.UserName)
  @Html.TextBoxFor(m => m.UserName)
  @Html.ValidationMessageFor(m => m.UserName)
</li>
<li class="name">
  @Html.LabelFor(m => m.RegistrationCode)
  @Html.TextBoxFor(m => m.RegistrationCode)
  @Html.ValidationMessageFor(m => m.RegistrationCode)
</li>
That’s it. Now anyone trying to register on the site will be required to provide the registration code.
