Facebook Authentication with the Facebook C# SDK and ASP.NET MVC 4
NOTICE: This content is very outdated. I recommend you check out Auth0 for an easy way to authenticate with Facebook.
One of the most common questions I get around using the Facebook C# SDK is how to authenticate a user. While there are samples and official Facebook documentation on the subject, it is something that is worth a review. Below you will find the step-by-step guide for authenticating a Facebook user to an ASP.NET MVC 4 application using the Facebook C# SDK.
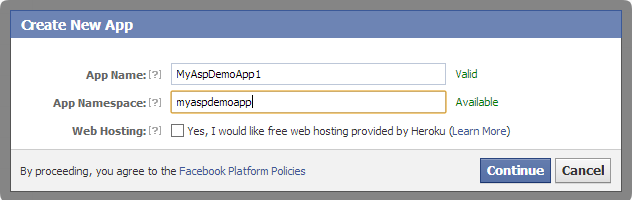
The first step for authenticating with Facebook is creating a Facebook App. You can do this in the Facebook Developer center. Click the “Create New App” button to create your application. When prompted, enter your app name and namespace. These can be anything you like, but must be unique.
After your app is created you will be taken to the app details page. Keep this open as you will need to complete the app configuration in a later step.
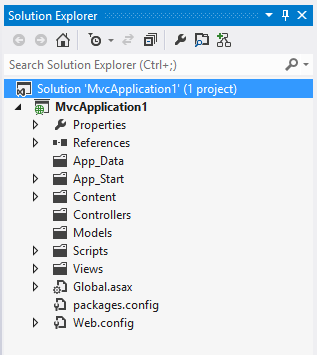
Next, create a new ASP.NET MVC 4 Application. For this tutorial we are going to do everything manually so select the Basic template. This will give us a nearly empty MVC application.
Next, we need to add the Facebook C# SDK. This can be done using Nuget. Right click on “References” and click “Manage NuGet Packages…”. This will bring up the NuGet Package Manager. Type “Facebook” in the search box and click “Install” on the Facebook package. This will download the Facebook C# SDK and add a reference to your project.
Next, create an empty MVC controller title “HomeController”. This controller will be used to display our secured content. Leave the default Index action and create an Index view. You can right click anywhere in the action code and click “Add View…” to create a basic view. We will secure this action and only allow authenticated Facebook users access.
Next, create an empty MVC controller titled “AccountController”. We will use this controller to handle Facebook authentication. Rename the Index action to Facebook as show below.
public class AccountController : Controller
{
  //
  // GET: /Auth/

  public ActionResult Facebook()
  {
    throw new NotImplementedException();
  }
}
The first part of the Facebook authentication process is redirecting the user to the Facebook OAuth page. To do this we need to build the Facebook OAuth Url correctly. The Facebook C# SDK contains a method that makes this easy. The code below shows you how to correctly build a Facebook OAuth url and redirect the user. Note that the RedirectUri value is a property; I am doing this because we will need that value for another action later. Additionally, you will notice that the RedirectUri points to the FacebookCallback action that we have not created. We will add this shortly. Finally, you will need to substitute your Facebook App Id and App Secret for the placeholder strings.
public class AccountController : Controller
{
  private Uri RedirectUri
  {
    get
    {
      var uriBuilder = new UriBuilder(Request.Url);
      uriBuilder.Query = null;
      uriBuilder.Fragment = null;
      uriBuilder.Path = Url.Action("FacebookCallback");
      return uriBuilder.Uri;
    }
  }

  public ActionResult Facebook()
  {
    var fb = new FacebookClient();
    var loginUrl = fb.GetLoginUrl(new {
      client_id = "your_app_id_here",
      client_secret = "your_app_secret_here",
      redirect_uri = RedirectUri.AbsoluteUri,
      response_type = "code",
      scope = "email" // Add other permissions as needed
    });

    return Redirect(loginUrl.AbsoluteUri);
  }
}
Now that we have the action that will start the auth process, lets secure the HomeController. To do this simply add the [Authorize] attribute to the HomeController as shown below.
[Authorize]
public class HomeController : Controller
{
  //
  // GET: /Home/

  public ActionResult Index()
  {
    return View();
  }

}
Now that our HomeController is secure we need to create a landing page for anonymous users. Back in the AccountController create a Login action that simply returns a view as shown below.
public ActionResult Login()
{
  return View();
}
Create a view for this action and add a Facebook login link as shown below.
@{
  ViewBag.Title = "Login";
}

<h2>Login</h2>
@Html.ActionLink("Login with Facebook", "Facebook")
Now we are ready to run the application. After the application starts you will be redirected to the login page. Click “Login with Facebook”. When you click the link your Account/Facebook action will create a Facebook OAuth url and redirect you to Facebook to complete the authorization process. However, you will notice the below error message is shown.
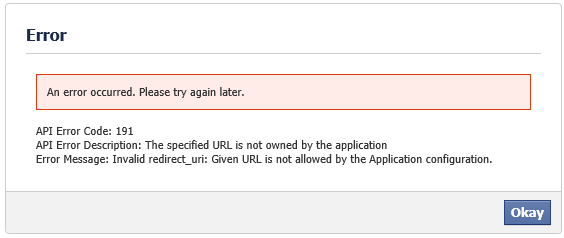
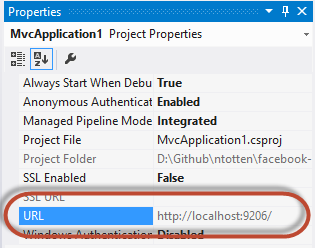
The reason for this error is that we did not correctly configure the Facebook App for authentication. For security reasons, Facebook doesn’t allow an application to authenticate with an app unless the return_uri is on an approved domain. In order to determine the url of our application return to Visual Studio, click on the MVC project and open the Properties window. There you will see the URL in which your application will run for local development.
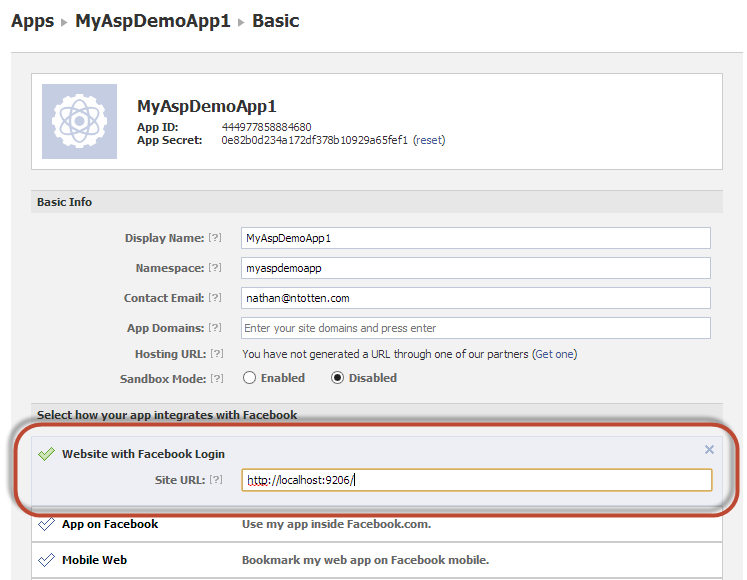
Next, you will need to configure your Facebook App’s settings with this url. Open the Facebook App properties in your browser that you left open from before. Under the “Website with Facebook Login” section set the Site URL as shown below. Be sure to click save.
Now run your web application again and click Login with Facebook. This time you will be redirected to the Facebook OAuth dialog where you can grant your application permission to authenticate using Facebook.
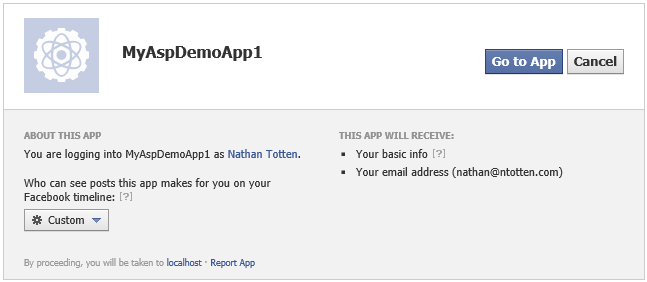
Click “Go to App” to continue. You will now be redirected to a url that looks like this: http://localhost:9206/Account/FacebookCallback?code=[facebook_auth_code_here]
In order to complete the authentication process we need to create a FacebookCallback action in our AccountController that converts the code Facebook returned into a user access token. Add the following code to your Account Controller for the FacebookCallback action.
public ActionResult FacebookCallback(string code)
{
  var fb = new FacebookClient();
  dynamic result = fb.Post("oauth/access_token", new
  {
    client_id = "your_app_id_here",
    client_secret = "your_app_secret_here",
    redirect_uri = RedirectUri.AbsoluteUri,
    code = code
  });

  var accessToken = result.access_token;

  // TODO: Authenticate User
}
Now you have completed the Facebook OAuth process and have a valid Facebook access token. From here you have a variety of options for authentication depending on your application. If you are not using a membership provider you could simply create an authentication cookie and store the access token. You can see how you could do this below.
public ActionResult FacebookCallback(string code)
{
  var fb = new FacebookClient();
  dynamic result = fb.Post("oauth/access_token", new
  {
    client_id = "444977858884680",
    client_secret = "0e82b0d234a172df378b10929a65fef1",
    redirect_uri = RedirectUri.AbsoluteUri,
    code = code
  });

  var accessToken = result.access_token;

  // Store the access token in the session
  Session["AccessToken"] = accessToken;

  // update the facebook client with the access token so
  // we can make requests on behalf of the user
  fb.AccessToken = accessToken;

  // Get the user's information
  dynamic me = fb.Get("me?fields=first_name,last_name,id,email");
  string email = me.email;

  // Set the auth cookie
  FormsAuthentication.SetAuthCookie(email, false);

  return RedirectToAction("Index", "Home");
}
If you are using a Membership provider you could create a user based on the user’s Facebook profile information. You could also store the access token in a database to use later, but remember they only last about 20 minutes so you will have to renew them as they expire.
Hopefully this helps clear up some of the confusion with Facebook authentication in an ASP.NET MVC 4 application.