Command-Query Separation on Windows Azure
Command-query separation is a fairly common approach to software development. There are a lot of different flavors and opinions on how it should be implemented, but at the core it is about separating your write methods from your read methods. This post will discuss one of the most common ways to use that pattern on Windows Azure. I am going to focus on the big picture of this rather than some of the finer details. There is plenty of reading out there if you want more information.
To begin, lets review a few of the concepts behind the command-query pattern. First, the core principle is that every method should either send data or receive data, but never both. Second, while the pattern itself isn’t focused on building to scale it works very well for many high scale applications. By combining the command-query pattern with some of our Windows Azure best practices we can create a highly reliable and scalable system that is both easy to design and easy to maintain.
Below you will see the basic steps in the command-query process.
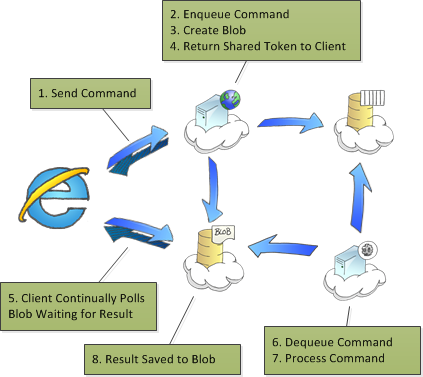
When you review the diagram there are a few things to note. First, is that we are performing our read operations directly from blob storage. This allows us to rely on the high scale of the Windows Azure storage systems and offload some of our HTTP requests from our Web Role.
Second, the heavy lifting of this application (Step 7) occurs in a Worker Role. This allows us to have fewer Web Roles and to ensure our web server is doing minimal work so that it is always extremely responsive.
Finally, because every command goes through our Windows Azure storage queues we can control the rate at which data is processed more easily. For example, if we had a third-party web service that could only handle say 100 requests per second and our system was processing 200 requests per second we could throttle the worker processing back to ensure we don’t overload the third party server.
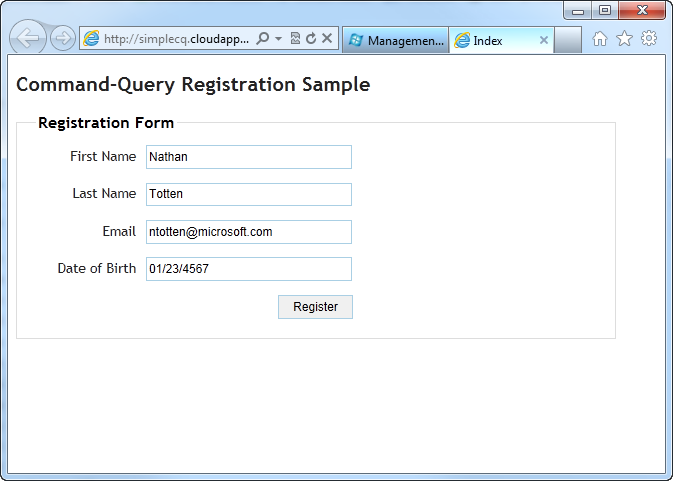
Before we dive into the example, I want to setup the scenario. For the purposes of this article we are going to build a simple command-query user registration system. The user registration will contain a simple form with first name, last name, email, and date of birth. The goal will be to register the user and return a registration token to the client after the registration is successful.
To begin the user is presented with the simple registration form.
(Step 1) After the user clicks register, we submit the form using some simple ajax. The sample uses ASP.NET MVC3 for the single service, but you could use anything you like. Below you will find the controller action.
[HttpPost]
public ActionResult Register(RegisterModel model)
{
  var queue =
    new AzureQueue<UserRegistrationMessage>
    (account);
  var registrationBlob =
    new AzureBlobContainer<RegistrationTokenEntity>
    (account, true);

  var containerId = Guid.NewGuid().ToString();
  registrationBlob.Save
  (containerId, new RegistrationTokenEntity
  {
    RegistrationToken = null,
  });

  var expires = DateTime.Now.AddHours(1);

  var blobContainer = registrationBlob
    .GetSharedAccessSignature(containerId, expires);

  queue.AddMessage(new UserRegistrationMessage
  {
    DateOfBirth = model.DateOfBirth,
    Email = model.Email,
    FirstName = model.FirstName,
    LastName = model.LastName,
    ContainerId = containerId,
  });

  return Json(new { container = blobContainer });
}
(Steps 2, 3, and 4) As you can see a few things are happening here. First, we are creating a random ID for the container. Next, we save the the blob container. The container we save has our token value set to null. Finally, we create the shared access token for the blob and return the blob url to the client. Below you can see the contents of the registration result blob in its initial state.
registrationtokenentityCallback({"RegistrationToken":null})
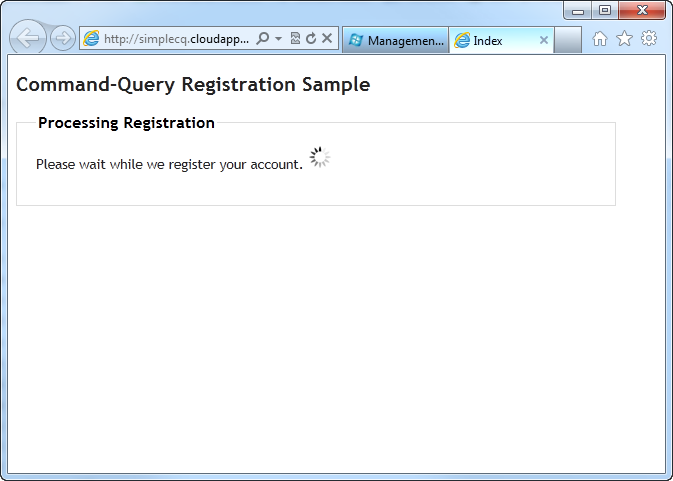
_(Step 5) _After we send the register post to the server our browser will show us a waiting page. In the background the browser is continually requesting the contents of the registration result blob. If the registration token is set to null, the client continues to poll the blob. This continues indefinitely. Note, in the real world you would want to handle the situation where there is either a failure and the blob doesn’t update or the processing is taking longer than usual.
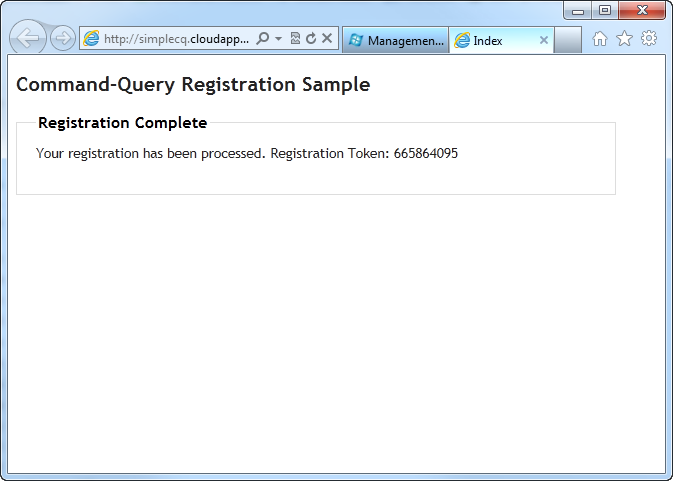
(Steps 6,7, and 8) While the client is waiting for the registration result blob to update our worker role is polling the registration queue for new registrations. In this case a new registration is in the queue so the worker role reads the message. This is the point where you would do your heavy lifting. This could be anything from saving the registration to a database, sending it to a web service, validating for duplicates, etc. After your worker role is done processing the registration it creates a token for the registration. The worker then updates the registration result blob with the token.
registrationtokenentityCallback(
   {"RegistrationToken":"665864095"}
)
After the registration result blob is updated with the registration token the client stops polling the blob and displays the result. You can see the polling script below.
var waitingId = null;
var tokenUrl = null;
$(document).ready(function () {
  step(0);
  $('#register').validate({
    submitHandler: function (form) {
      $(form).ajaxSubmit(function (result) {
        tokenUrl = result.container;
        waitingId =
           setInterval('checkForToken()', 1000);
        step(1);
      });
    }
  })
});

function checkForToken() {
  try {
    $.ajax({
      type: "GET",
      url: tokenUrl,
      dataType: "jsonp",
      jsonpCallback: 'registrationtokenentityCallback'
    });
  } catch (ex) { }
}

function registrationtokenentityCallback(data) {
  var regToken = data.RegistrationToken;
  if (regToken != null) {
    clearInterval(waitingId);
    $('#txtToken').text(regToken);
    step(2);
  }
}
That is the entire process for this basic command query example. The result is a flexible and distributed systems that allows you to handle even the largest scale.
You can find the entire source for this example on GitHub here or download the zip file here. Additionally, you can find a deployed version at http://simplecq.cloudapp.net.
Let me know if you have any questions.