Windows Azure Tools 1.4 Released
Today, the Windows Azure Tools for Visual Studio 1.4 were released. These tools add a number of enhancements to the Windows Azure development and deployment experience that will make your life a bit easier. Below I am going to cover a few of the enhancements included with this release. For the full details you can see the release notes on MSDN here.
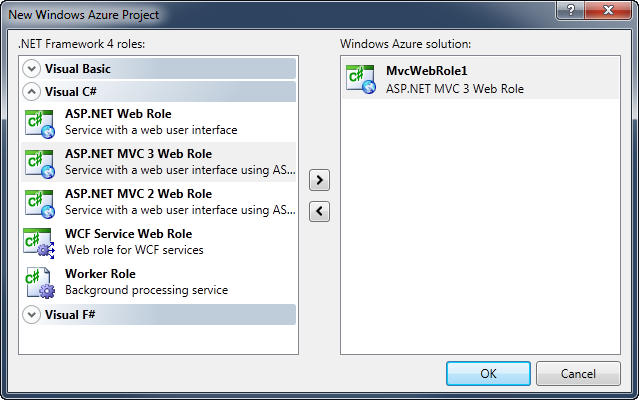
The biggest change for web developers is that the tools now include the latest MVC3 templates. You no longer have to create your cloud project and add an MVC3 application manually. You can see the updated template list with an MVC 3 Web Role selected.
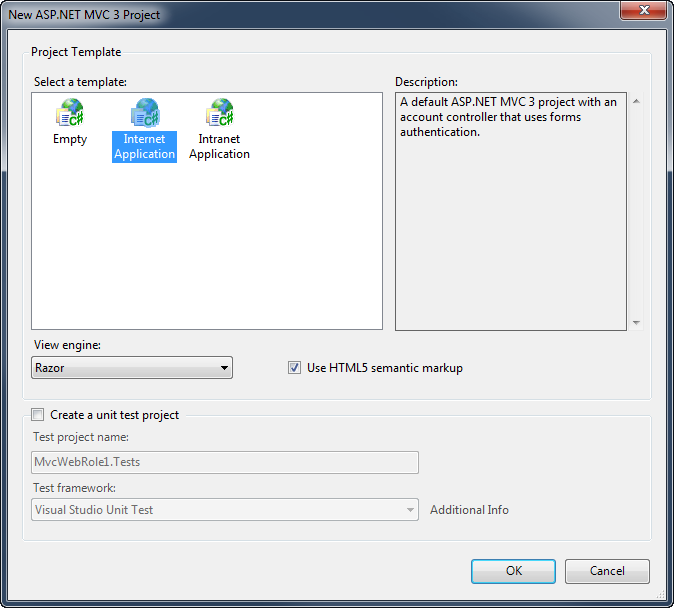
After you select the MVC3 Web Role you will be prompted with the standard MVC3 project dialog asking for various template and configuration options.
Once the project is created you will have a standard MVC3 Web Application with the WebRole.cs class and the Windows Azure references automatically added.

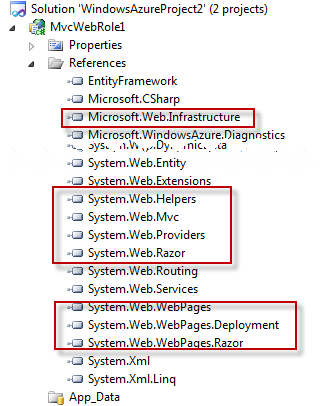
Another time saving improvement is that the necessary MVC3 and Razor assemblies are added automatically to this template and are set to copy local. This has always been something you had to do manually in order to deploy an MVC3 web application to Windows Azure.
A final thing to note about this template (and all the web role templates) is that they now include the new ASP.NET Universal Providers. These new providers replace the old membership, role, session, and profile providers that have been included in ASP.NET since version 2.0. The new universal providers add native support for SQL Azure and SQL Compact. You can see the updated configuration file with the new providers below.

As you can see the new universal providers are enabled by default. The old providers are included, but these shouldn’t really be used for Windows Azure deployments.
IMPORTANT NOTE: If you attempt to deploy your unmodified solution to Windows Azure it will not work. You must either disable session state, change the DefaultConnectionString to point to a SQL Azure database, or change the session to use Windows Azure Caching. The reason the deployment will fail is because on the first load your site will check to make sure the session state database is configured. If it is not, it will attempt to create the database. By default the connection string is set to use .SQLExpress which isn’t available on your Windows Azure Web Role.
The simplest fix is to just disable session state if you don’t plan on using it. To do so, just change the mode to “Off” as seen below.

It is also worth noting that there is another new feature in this release of the tools that actually warns you about this problem. When you deploy you would see this warning:

In my opinion this should actually register as an error rather than just a warning, because you can still ignore it, but when your deployment finishes you will just get the YSOD.
The final feature I will mention in this post is that you can now use multiple cloud configuration files. This makes it easy to have a separate configuration file for local development, staging, and production. These multiple configurations are similar to how Web.Config transforms allow you to have different configurations for different environments. The biggest difference is that with the cloud configuration files they aren’t transforms, but simply entire configuration files.
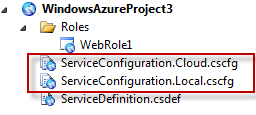
When you deploy your application you select which configuration file you want to use in the deployment dialog. You could also script this if you were automating the deployments.

I think you will find that this updated tools will improve your Windows Azure development experience. For the full set of features and changes read the post on MSDN and download the tools now to try them out.