Windows Azure Accelerator for Web Roles
I am excited to announce the first release of the Windows Azure Accelerator for Web Roles. This accelerator enables you to deploy websites to a Windows Azure role with multiple instances using Web Deploy. You can now easily and quickly build, test, and deploy sites on Windows Azure using Web Deploy while still utilizing the full scale and reliability of Windows Azure.
You can download the accelerator here: https://github.com/microsoft-dpe/wa-accelerator-webroles
The Windows Azure Accelerator for Web Roles contains the following items:
- Project Template – The project template, titled “Windows Azure Web Deploy Host”, is included with the accelerator and once installed can be found in the Cloud section of your new project dialog.
- Documentation – We have included documentation both in the project template and on CodePlex that will help you get started quickly using this accelerator.
- NuGet Packages – The core components of this accelerator are available as two NuGet packages. This will allow you to install the code into either a new or existing Web Role. Additionally, you can use these packages as a starting point for your custom solutions build on top of this accelerator.
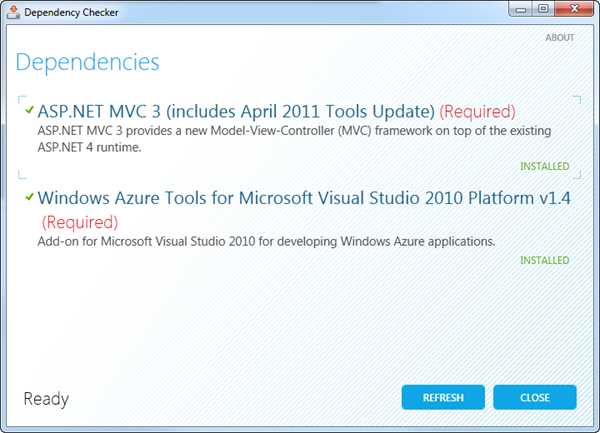
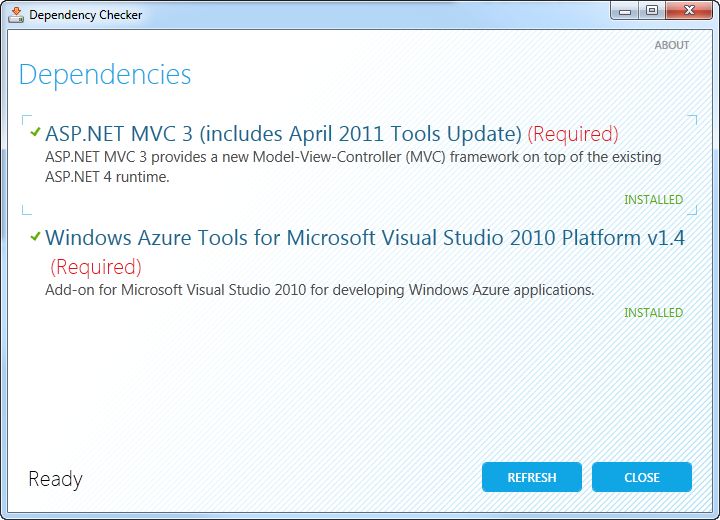
- Dependency Checker – The installer for this accelerator comes with our new and improved dependency checker to make sure your machine has everything you will need to run this accelerator successfully. Our new dependency checker integrates with the Microsoft Web Platform Installer to make your installations even easier.
Below you will find step by step instructions on how to get started using this accelerator.
-
First you will need to download and install the accelerator. Go to http://waawebroles.codeplex.com and download the latest release. The download is a self-extracting executable. You can select a custom location to extract the files or use the default.
-
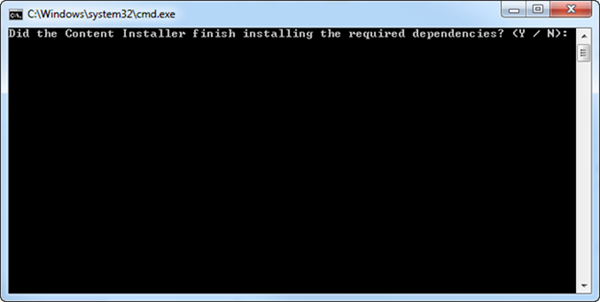
After the files have extracted navigate to the folder you selected and run the StartHere.cmd. This command will bring up a command prompt and the dependency checker.
-
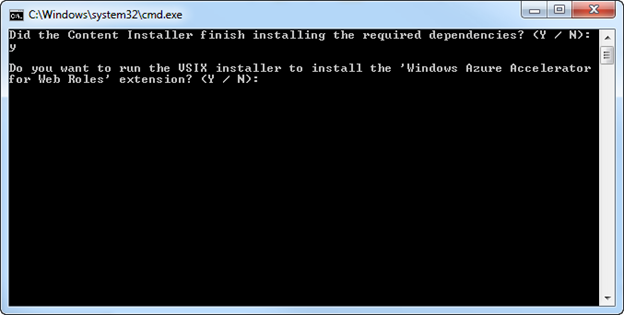
The dependency checker will make sure you have everything you need to use the accelerator. After you have installed the required dependencies close the dependency checker.
-
Next, you will see the command prompt asking you if the dependency checker finished. Press “Y” and “Enter”.
-
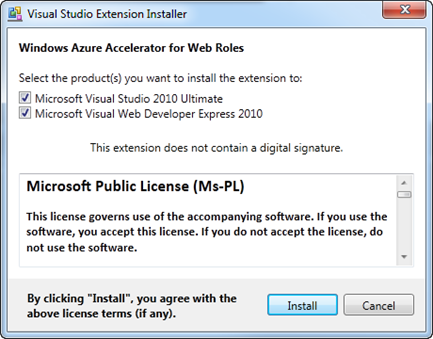
Now you will be asked if you want to install the project template. Again, click “Y” and “Enter”.

-
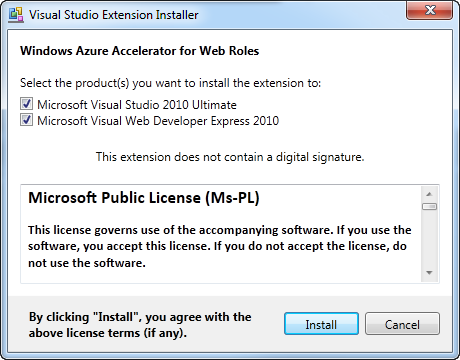
You will then be prompted with the Visual Studio Extension Installer. Follow the steps to install the extension. After that finishes, press any key to exit the command prompt.
-
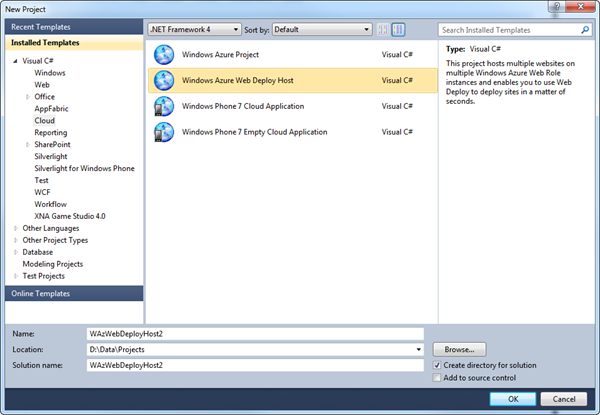
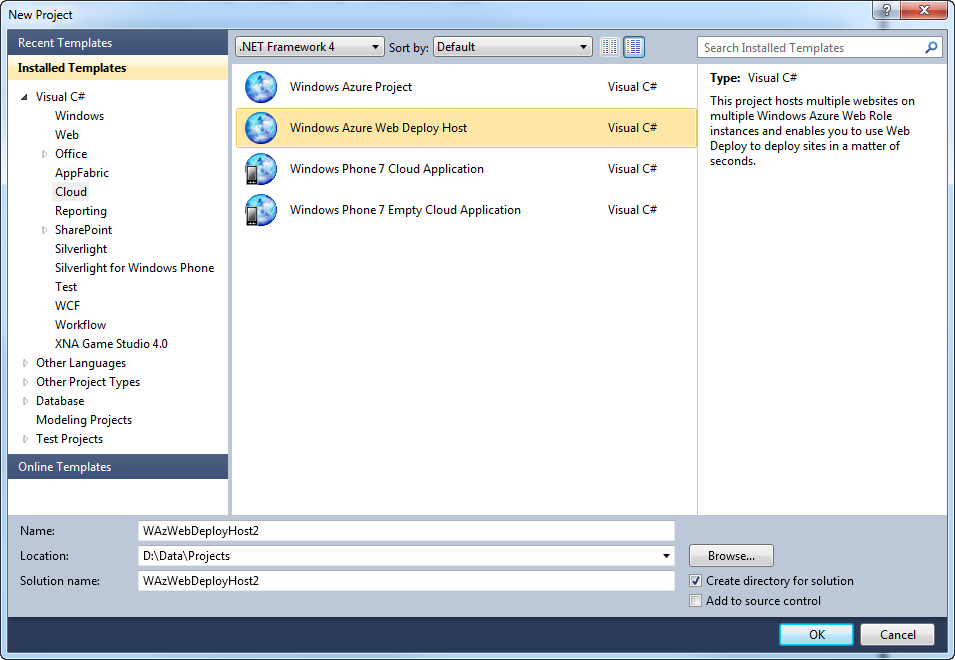
Now open Visual Studio and create a new project. You will find a new project template called “Windows Azure Web Deploy Host” with your cloud templates. Select this package and create the solution.
-
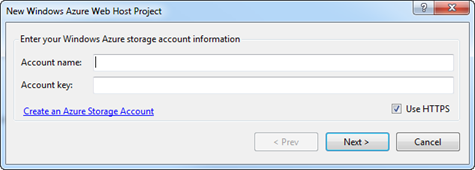
You will be prompted to provide your storage account information. You must use a real Windows Azure storage account and not local storage for this. Go here for instructions on how to create a storage account. After you enter your account details click “Next”.
-
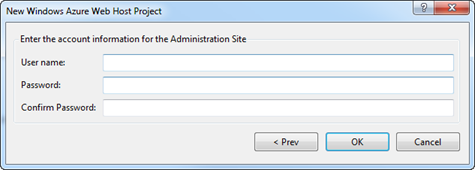
Next you will be prompted to create a username and password for the accelerator’s administration site. These are the credentials you will use to login to the web interface of the accelerator to create and manage your IIS sites.
-
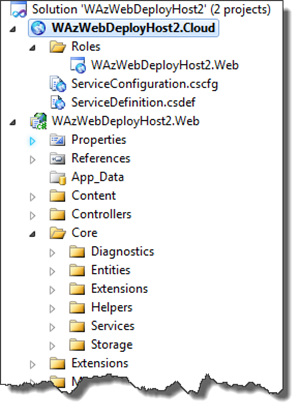
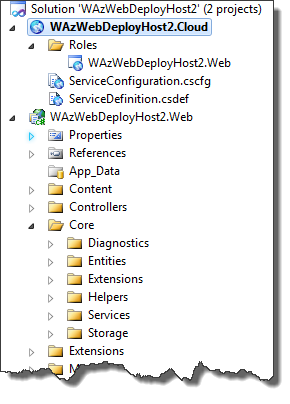
Your project is now created and ready to deploy.
-
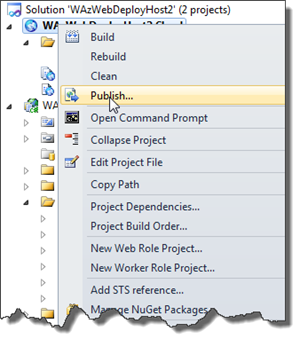
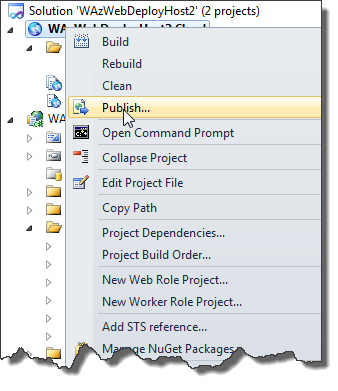
To begin the deployment process, right click on the Cloud project and click “Publish”.
-
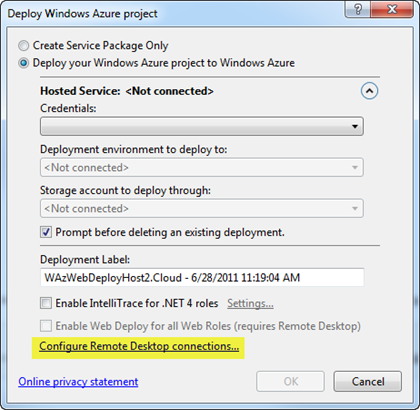
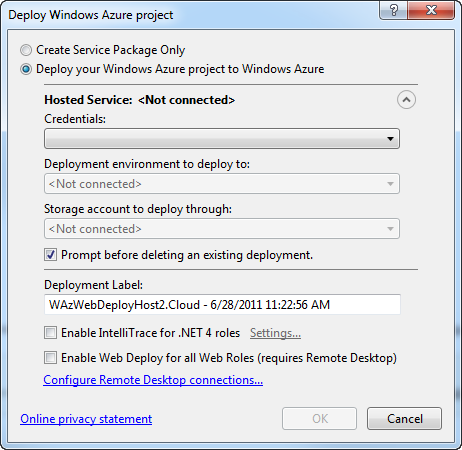
Now you will need to configure Remote Desktop. Click the “Configure Remote Desktop connections…” link at the bottom of the deploy dialog.
-
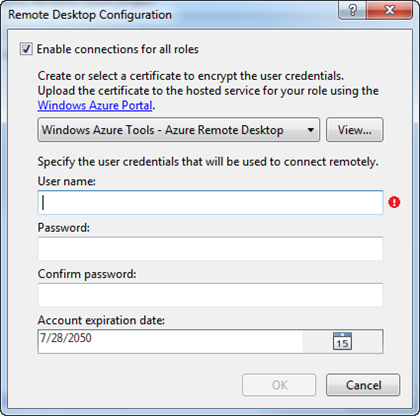
Select “Enable connections for all roles”, enter your user name and password, and change the Account expiration date. You will most likely want a date that is way out in the future as you won’t be redeploying this role very often. Note that this username and password are the credentials you will use when deploying sites to your role with Web Deploy.
-
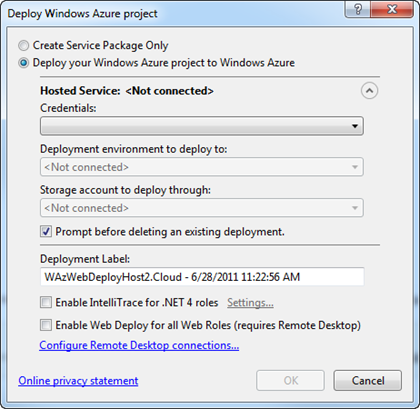
Now you will need to select your Windows Azure deployment credentials or create new credentials. You should deploy to production and select your storage account. The storage account can be the same that you used earlier. After you are done click “OK” and wait for your role to deploy.
-
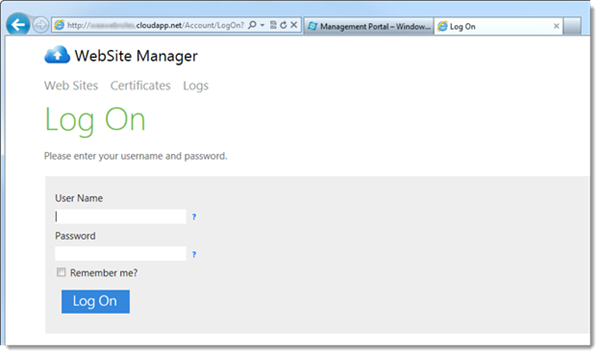
Now that your role is deployed you are ready to deploy your websites to the instances. To start, navigate to your admin portal at http://yourhosturl.cloudapp.net. You will need to enter your administrator username and password. These are the credentials from step 9, not your Remote Desktop credentials.
-
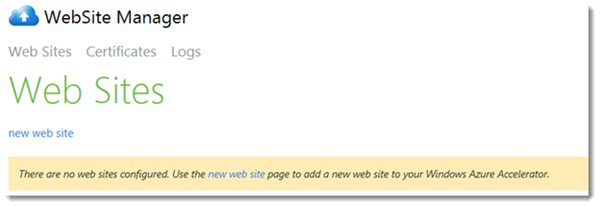
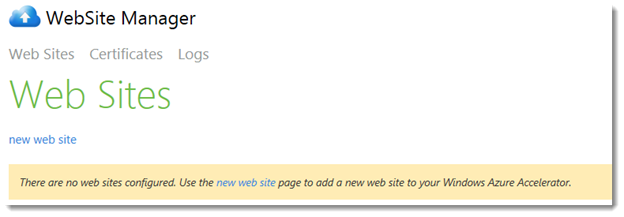
After you login you will be brought to the Web Site manager. To get started click the “new web site” link.
-
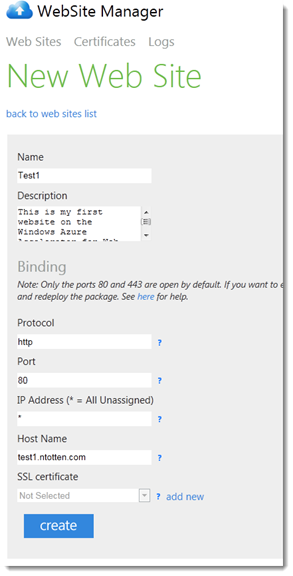
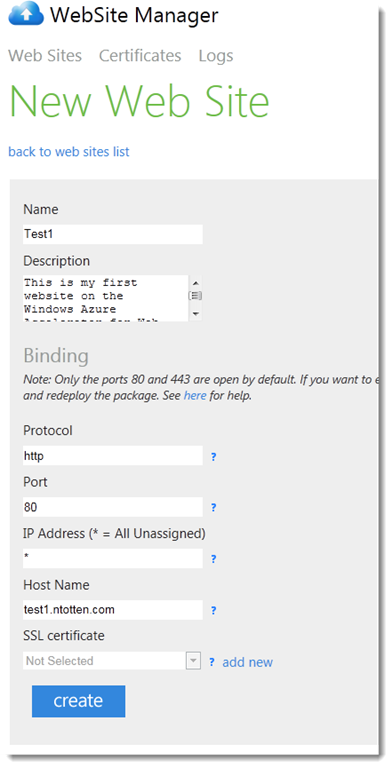
The new web site form is where you configure your site name and bindings like you would in IIS. Enter the site name, protocol, and host name for your new site. After you are done click “create”.
-
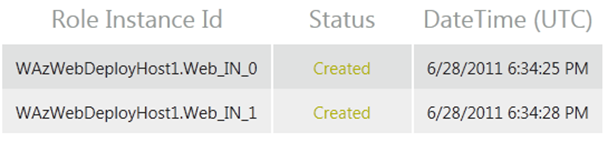
You can now see the new site is in the configuration. To check the status of the site select the “i” icon.

-
You can see if the site has been created on each instance of your web role. After the status is set to “created” you are ready to deploy the site.
-
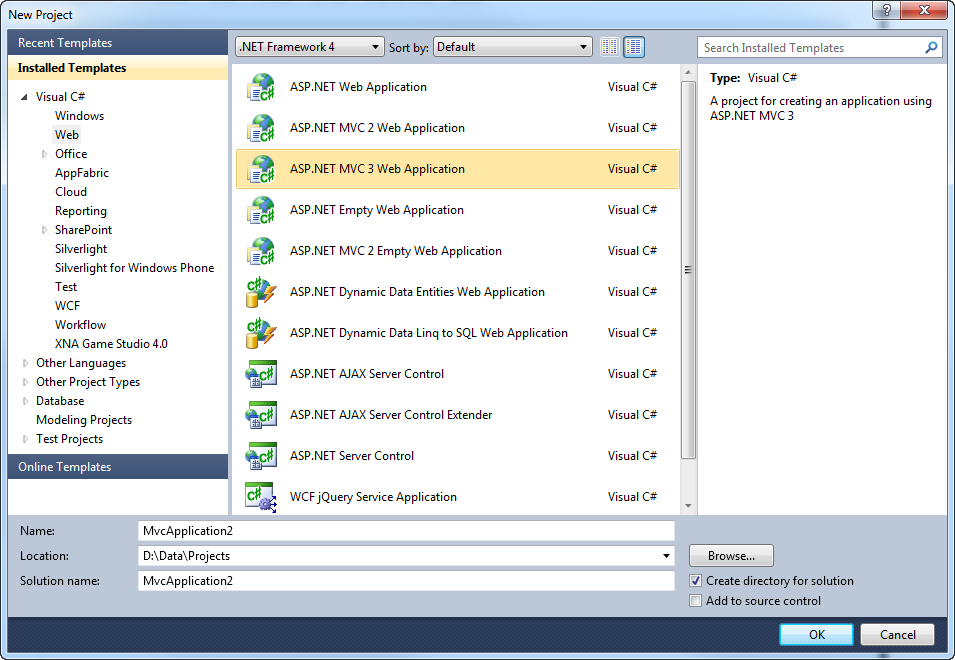
We can now open up Visual Studio or WebMatrix and create a new website that we will deploy to our new role. For this example, I will use Visual Studio. We will create a regular MVC 3 web application. We do not need a cloud project for this site.

-
Before we deploy this site, we need to make sure we include the MVC 3 assemblies in the project as MVC 3 is not installed on Windows Azure Web Roles. To do this, right click on the MVC 3 project and click “Add deployable depenancies…”. Select ASP.NET MVC and click “OK”.


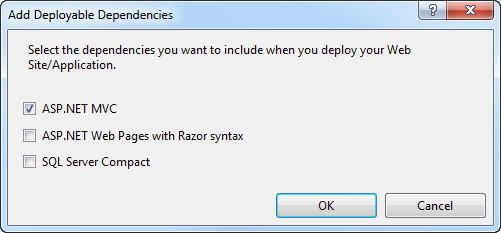
Note: this feature is only available in Visual Studio 2010 SP1, if you don’t have that you can manually add the required assemblies.
-
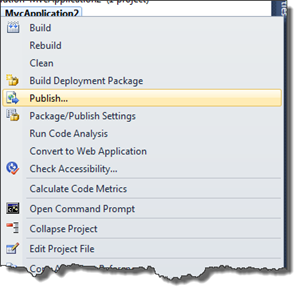
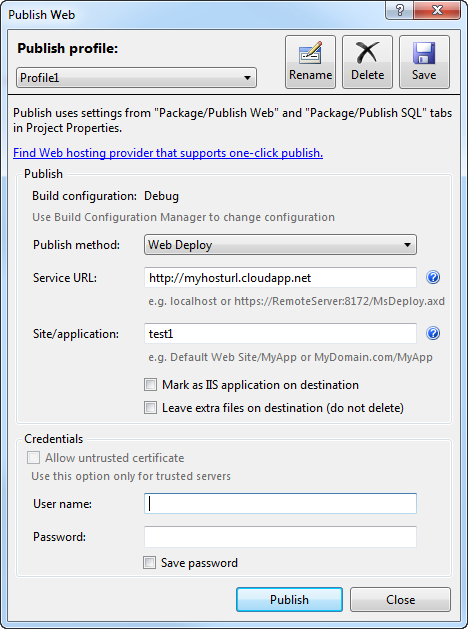
Now we are ready to deploy our site using Web Deploy. Right click on your website project and click “Publish”.
-
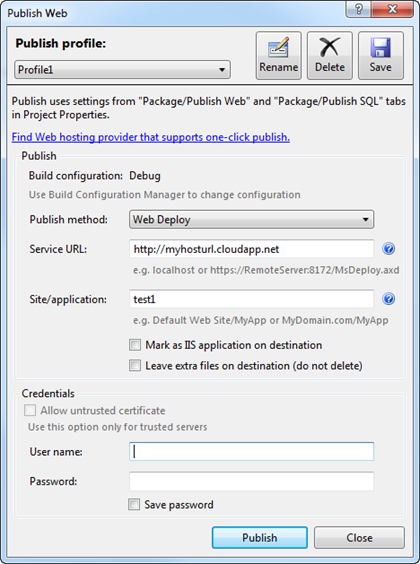
Set the settings in the web deploy dialog as shown. Your service URL should be set to your Windows Azure host url. The Site/application is the same as the “name” you entered in the administrative portal. Your username and password are your Remote Desktop credentials you created in step 13. After you have entered your information click publish. Note: You must uncheck the ‘Leave extra files on destination (do note delete)’ box before you deploy.
-
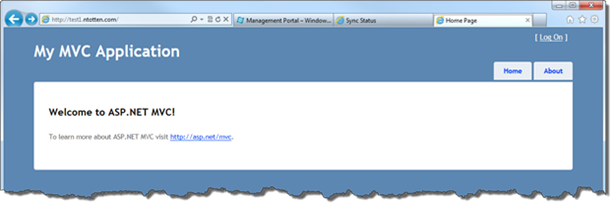
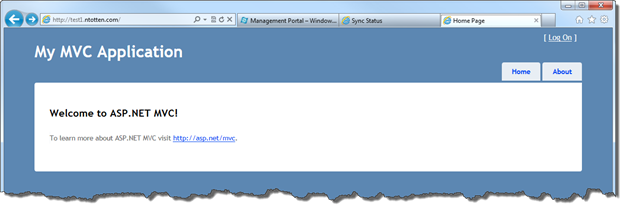
After your site is published it will take 30 seconds or so to update on every instance of your web role. You can check the status of the deployment in the administrative portal. Note that you will also need to setup your DNS record appropriately. For my example I have test1.ntotten.com set as a CNAME pointing to myazurehost.cloudapp.net. You could also use an A record to the role’s IP address.

You are now able to easily and quickly deploy multiple websites to a Windows Azure Web Role with multiple instances. If you need to scale, simply edit the configuration file and increase the number of instances in the web role.
Also, be sure to check out the screencast on Channel 9 titled “Getting Started with the Windows Azure Accelerator for Web Roles”.
Please let me know how this works for you and if you have any issues or find any bugs please file them on Github at https://github.com/microsoft-dpe/wa-accelerator-webroles.